Step 1
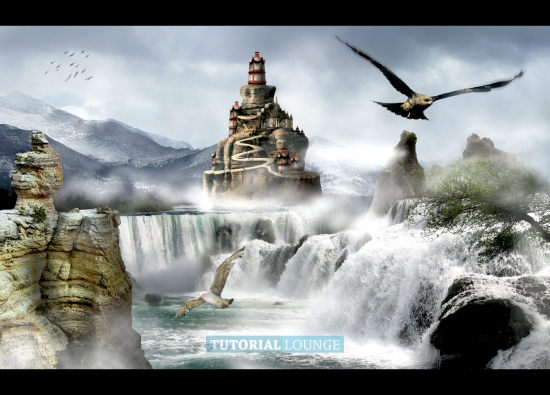
Before start to compose, take a look of this sketch. This is a scene we're going to create.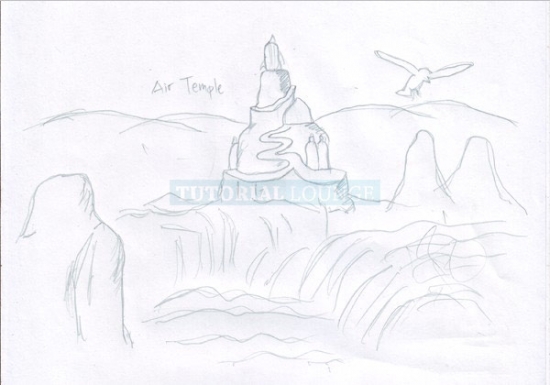
Step 2
Create a new 1600 x 1150 px document. Take the "Rocky Mountain National Park 3" and put it on top of canvas. Resize it with "Cmd / Ctrl + T" in order to get right proportion.
Step 3
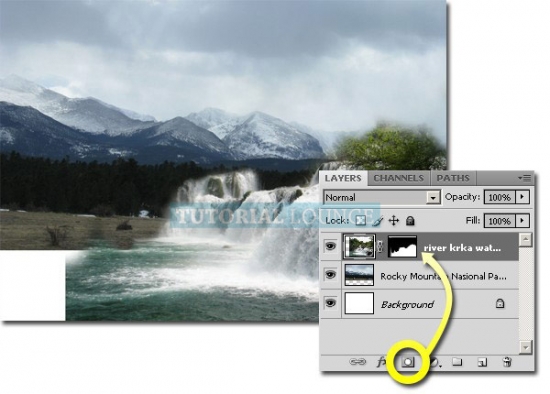
Then add the "River Krka Waterfalls" in front of previous image. Place it on bottom right of the canvas.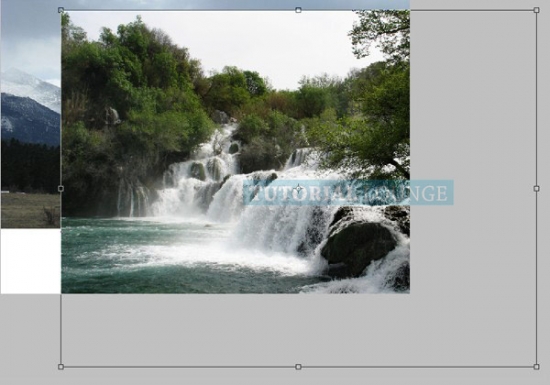
Step 4
Now do masking on "River Krka Waterfalls", hide the unnecessary space. We just need the waterfall and a small tree. Click on "Add layer mask" icon then use brush with black color to make mask. The unnecessary space is shown below with red color.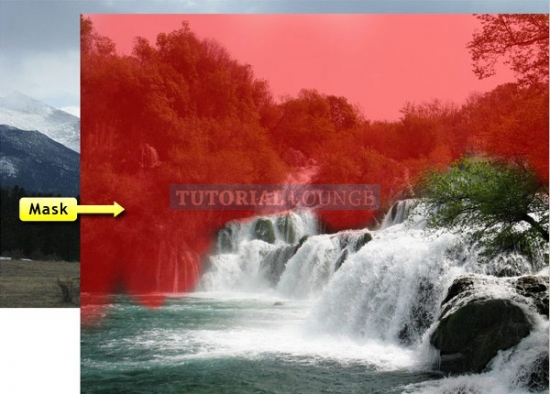
And here is the result of masking.
Step 5
Now import the other waterfall stock.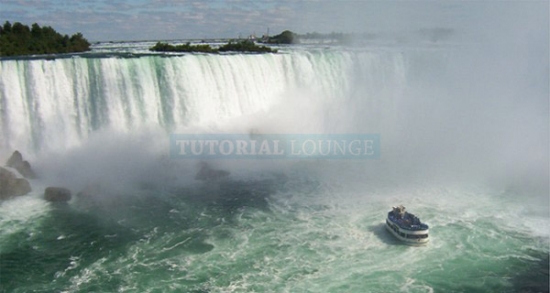
And place it behind the "River Krka Waterfalls" layer.
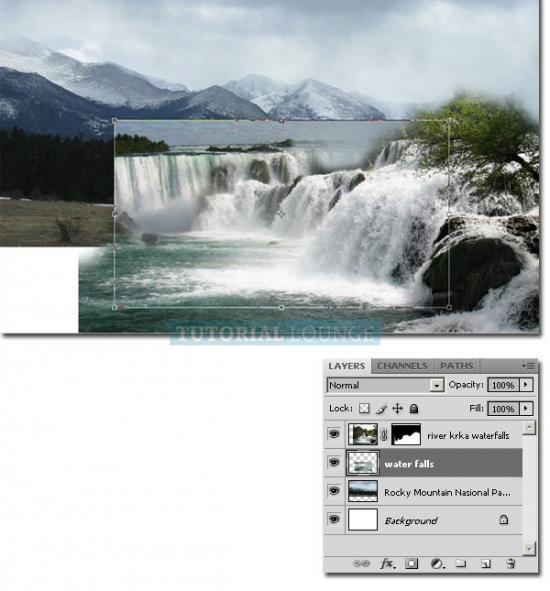
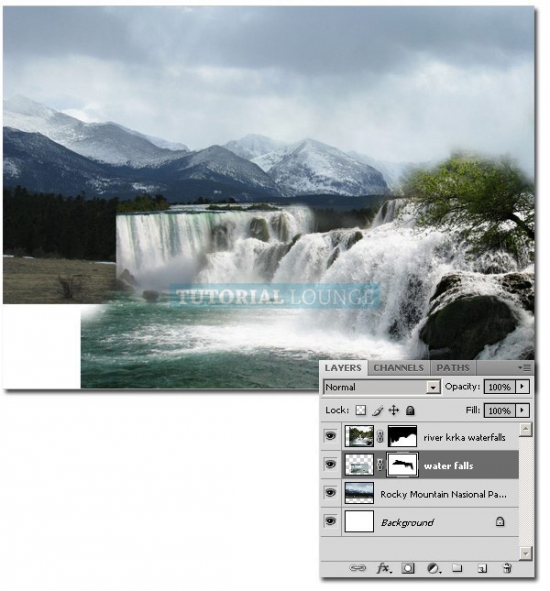
Then create mask on the "Waterfall", like this.
Step 6
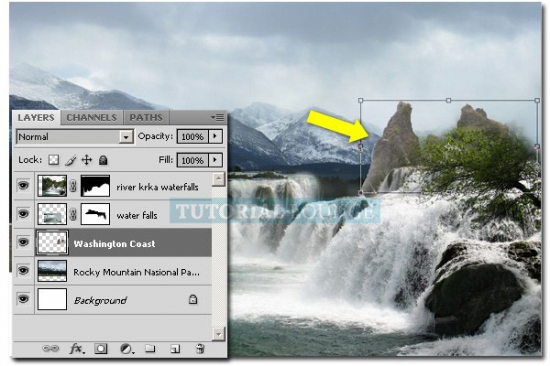
Take the "Wahington Coast" and cut out the hills.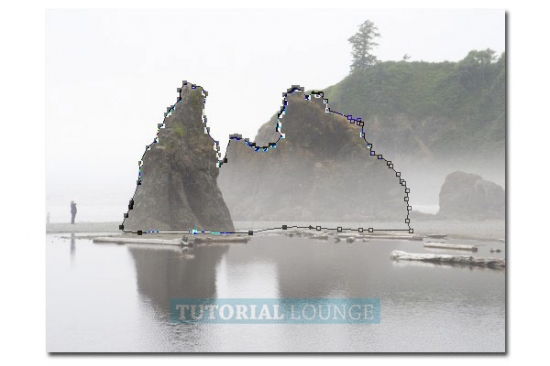
Put it behind waterfalls. Arrange the proportion and place.
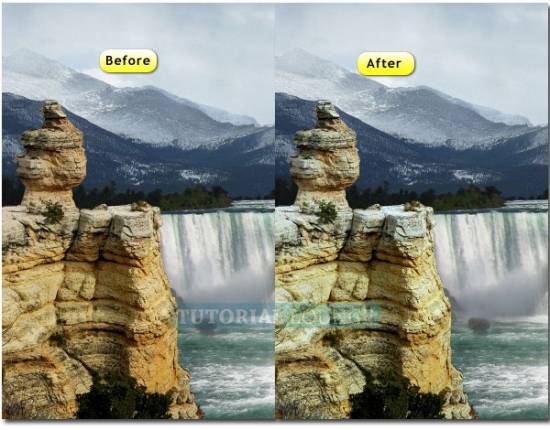
Step 7
We need Dodge Tool to add bright side, then Burn Tool to add dark side. See this image below for reference.
Step 8
Next is "Grand Canyon Scenic 4". Use Pen Tool (P) to make path of selection we need. After selection change (Ctrl+Enter), bring it into the composition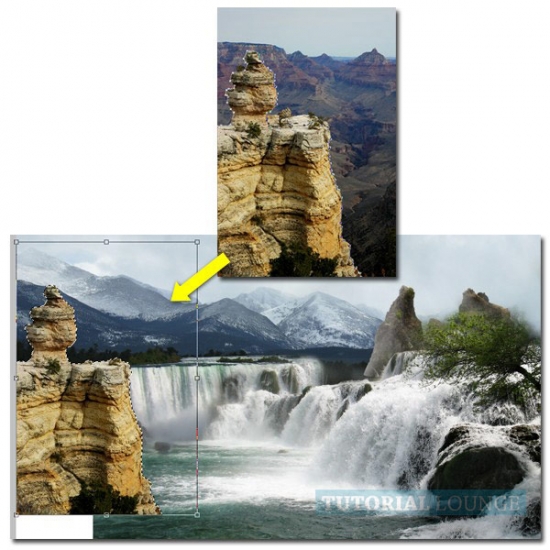
Step 9
Now we need Color Balance Adjustment in order to get color matching between canyon and waterfall. Click on adjustment icon at the layer pallet and select "Color Balance". Then create clipping mask (Cmd + Opt + G / Ctrl + Alt + G) so this adjustment just influences the "Grand Canyon" layer. Set like this: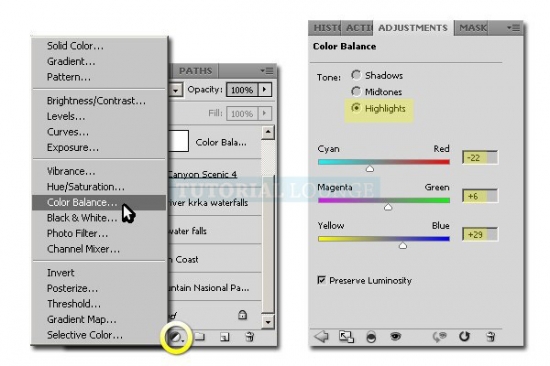
And the result of adjustment is:.
Step 10
Then we will correct the wrong lighting of this object. In our project, the light source is from left to right, so use Dodge Tool to increase the brightness of left side and use Burn Tool to increase the darkness of the right side. Set the range to "Midtones", Exposure 30% and Hardness 0%.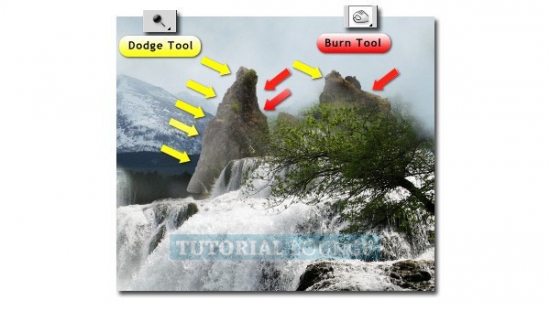
Step 11
The darker side should be increased again. Create new layer (Cmd / Ctrl + Shift + N), then create clipping mask (Cmd + Opt + G / Ctrl + Alt + G) and set the blending mode to "Multiply". Activate Brush Tool (B), set the opacity 30%, hardness 0% then paint carefully.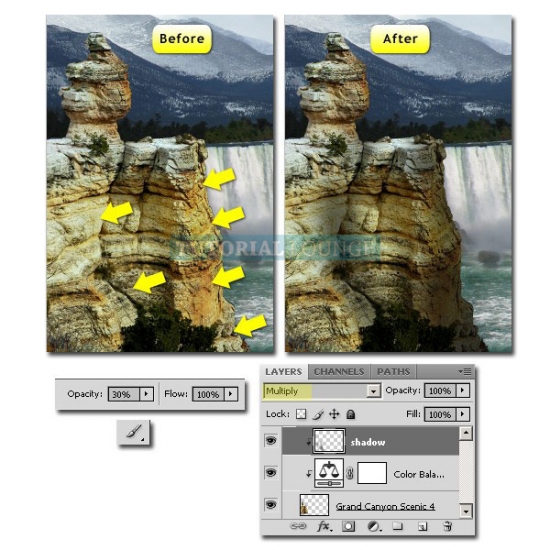
Step 12
Import "El Tajo" then use Pen Tool (P) to make a path on it. See this image below for reference, we will create a place to build the temples. While the path has done, right click and select "Make Selection", then drag it to our canvas.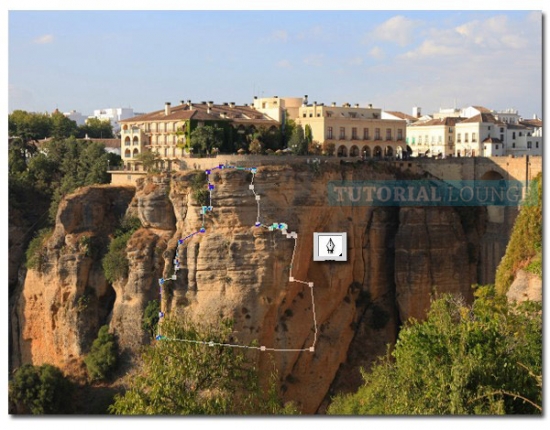
Place it behind the waterfalls.

Step 13
Add "Color Balance" adjustment by clicking layer adjustment icon on the layer pallet and select "Color Balance". Then press Cmd + Opt + G / Ctrl + Alt + G to create clipping mask.Input the following setting:
Step 14
Import the "Bagan Temple", crop it from its background then drag it to "El Tajo".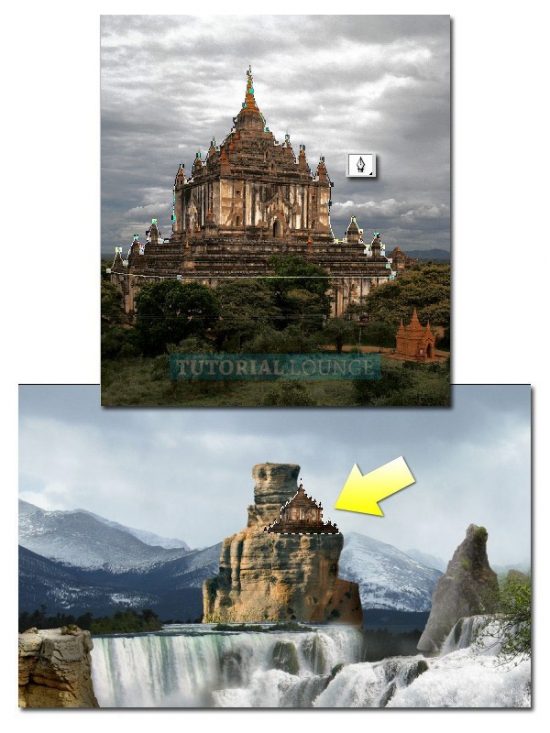
Step 15
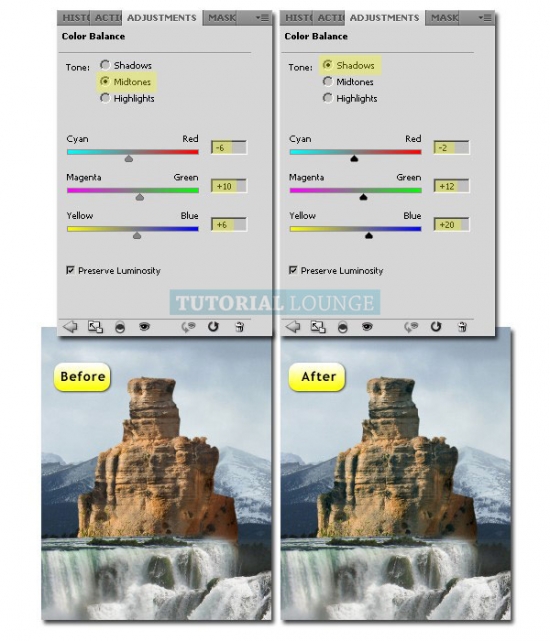
Add "Color Balance" Adjustment and create clipping mask (Cmd + Opt + G / Ctrl + Alt + G). Input the following setting: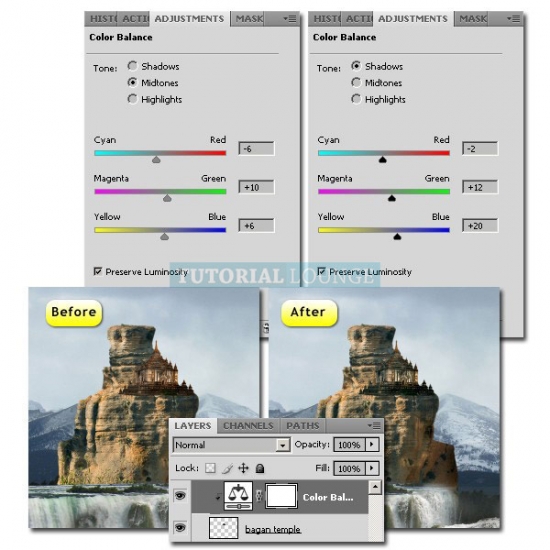
Step 16
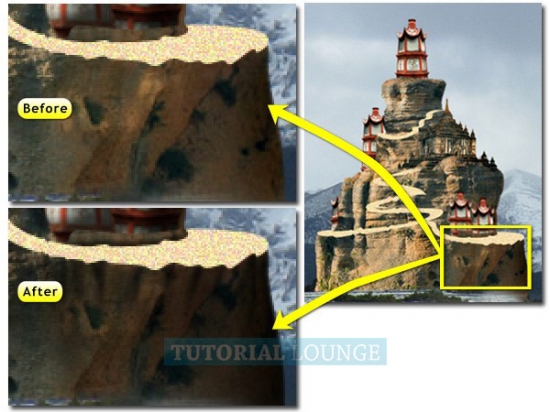
To adjust the light and shadow, give dodge and burn to "Bagan Temple". Use low exposure and hardness.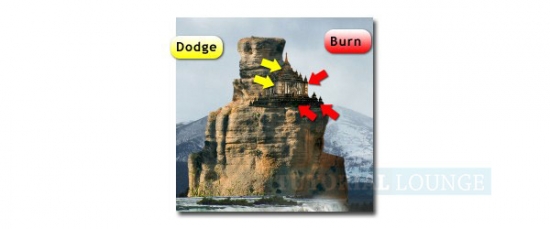
Step 17
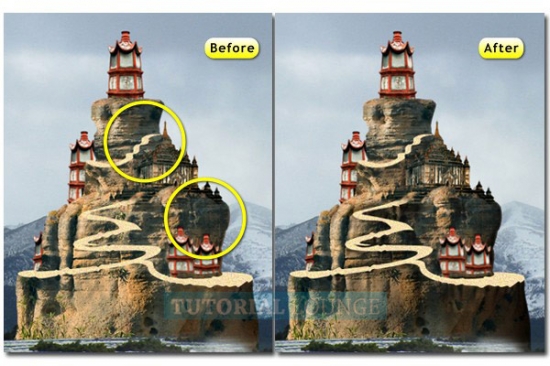
Now add layer mask and hide same unnecessary parts of "Bagan Temple".
Step 18
Activate Pen Tool with "shape layer" setting. Set color to #ffdeac and draw the road. For more realistic result, add more curvatures.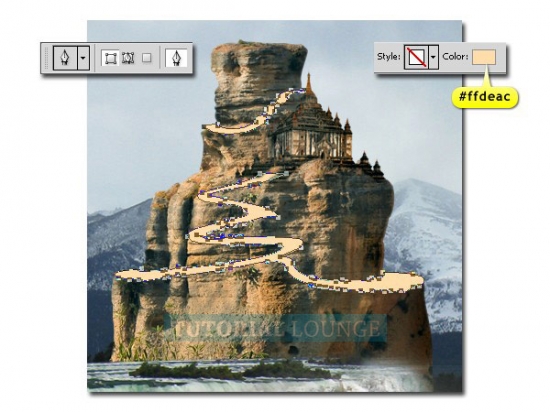
Step 19
Then click menu Filter > Noise > Add Noise. Before proceeding, the shape layer will be rasterized, just click OK.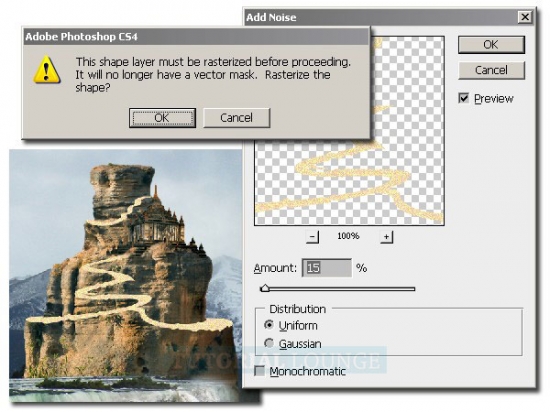
Step 20
Now take "Temple Joss Paper Furnaces", crop it from the background then drag to the composition. Place it behind the road and clone it using Cmd+Opt+Drag / Ctrl + Alt + Drag. Also add behind "El Tajo"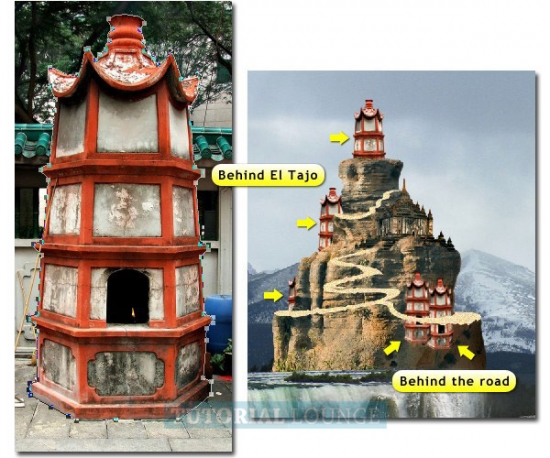
Step 21
For each of "Temple Joss Paper Furnaces" give a clipping masked "Color Balance" adjustment layer, and use the following setting.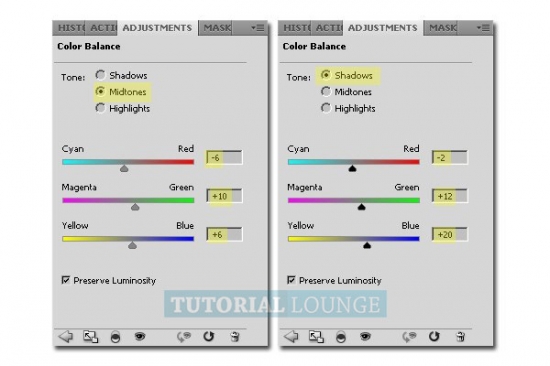
Step 22
Create layer mask on "Temple Joss Paper Furnaces" that placed behind the "Road". Hide the unnecessary parts.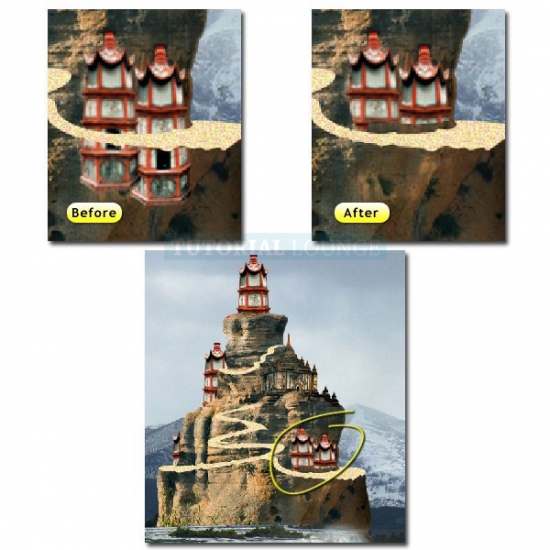
Step 23
Now we back to "El Tajo" layer. Press Cmd / Ctrl + Shift + N to create a new layer in front of it. Name it "Shadow" select "Multiply" for layer blending mode. Then create clipping mask (Cmd + Opt + G / Ctrl + Alt + G). Activate Brush Tool (B), use 0% hardness and 20% Opacity.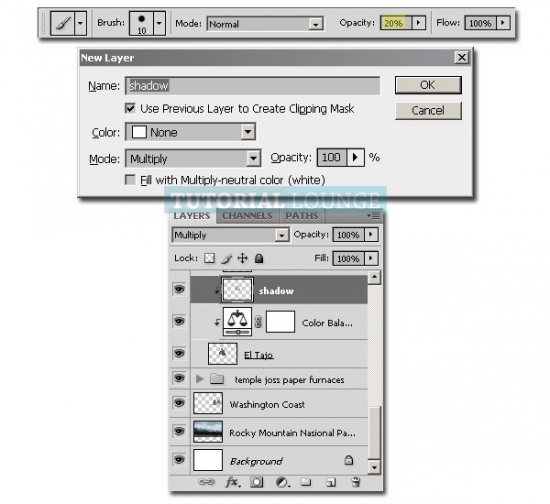
Paint the dark side with black carefully.
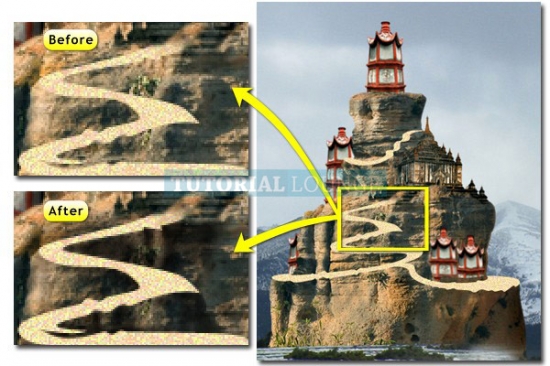
Pay attention to these parts, the road's curvature affects the dark side.
The way we paint dark side complies the curvature of the road.
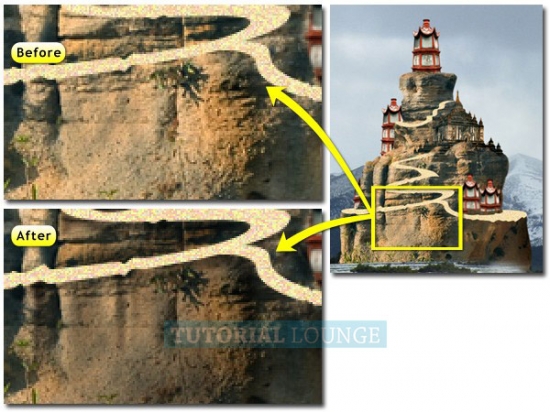
Also add dark side to these parts:
Step 24
For the other layers, the "Road", each of "Temple Joss Paper Furnaces" and "Bagan Temple", create new clipping masked layers with "Multiply" blending mode, then paint the dark side. If needed we can also add the highlight side on new clipping masked layer with "Screen" blending mode and paint with soft white.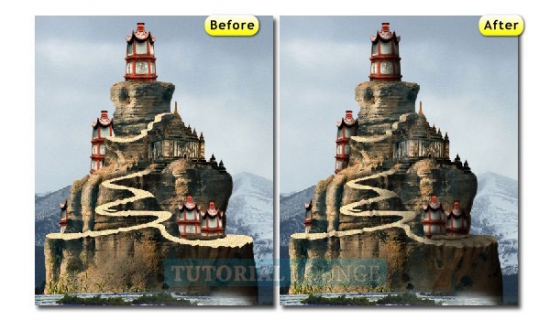
Step 25
Now take bird image, choose "Kite in Flight". We can use Quick Selection Tool to separate the object from its background. Then drag it into the composition.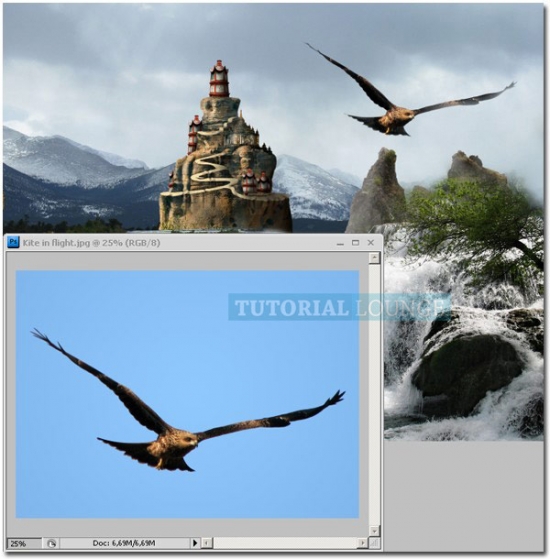
Step 26
Add clipping masked "Color Balance" layer adjustment and use following setting.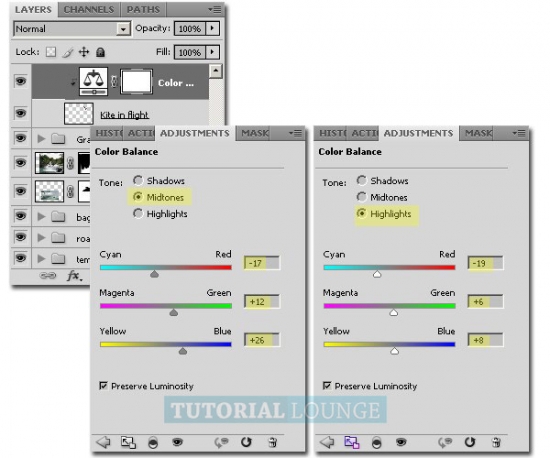
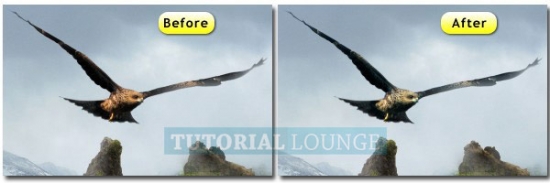
The bird before and after adding adjustment shown below.
Step 27
Duplicate the "Kite in Flight" layer and give motion blur.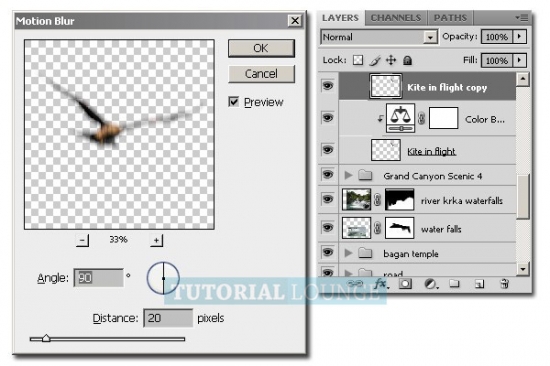
Step 28
Add layer mask and hide the body, so the wings look like flapping.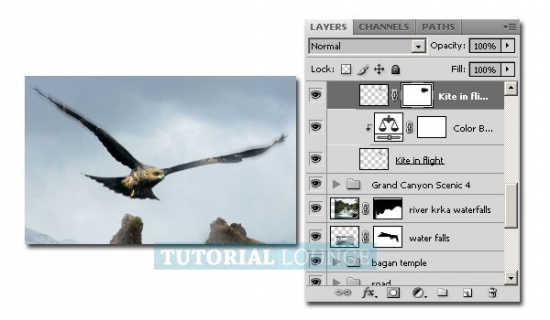
Step 29
Take "Seagulls in Flight", grab one of the birds, drag into the canvas.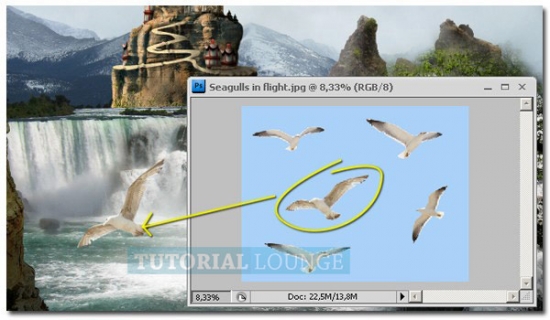
Step 30
Use Burn Tool to darken the wings and tail.
Step 31
Now create clipping masked "Color Balance" adjustment layer and use following setting: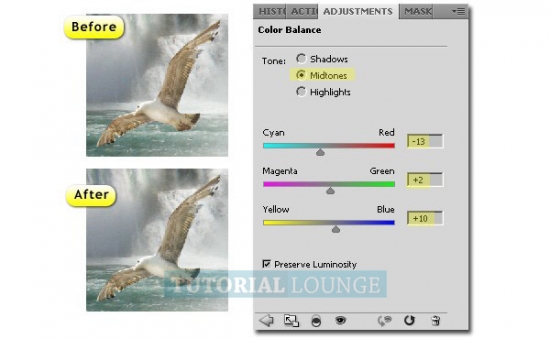
Step 32
Take the bird brush and create "Flock of Birds".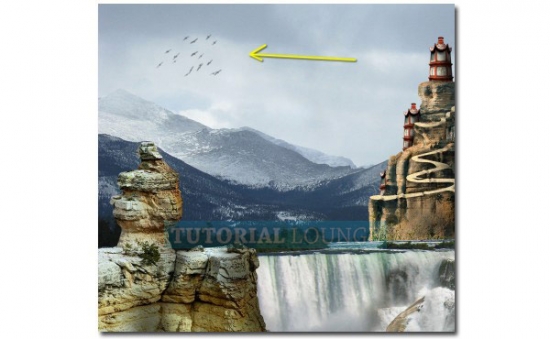
Step 33
Press Cmd / Ctrl + Shift + N to create a new layer. Then activate Brush Tool (J), set color to white, paint the "mist" with low opacity and 0% hardness.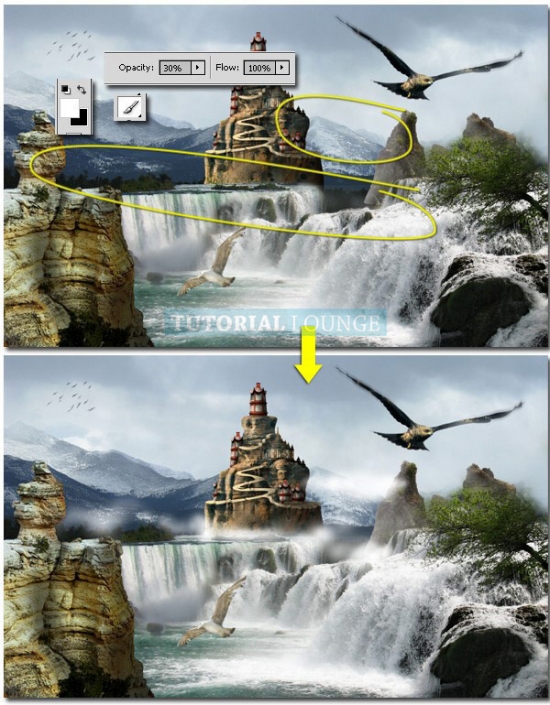
Step 34
Create new layer again. Set the background and foreground to default. Then click menu Filter > Render > Clouds. And set blending mode to "Screen".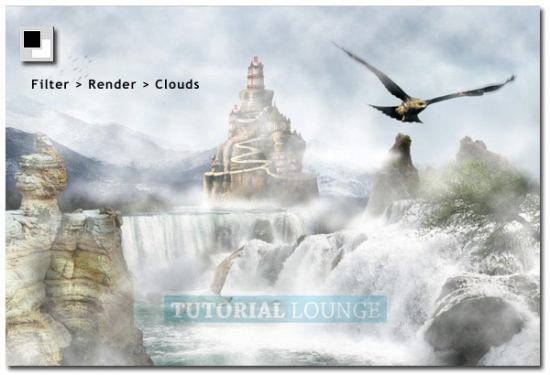
Step 35
Add layer mask and hide several parts.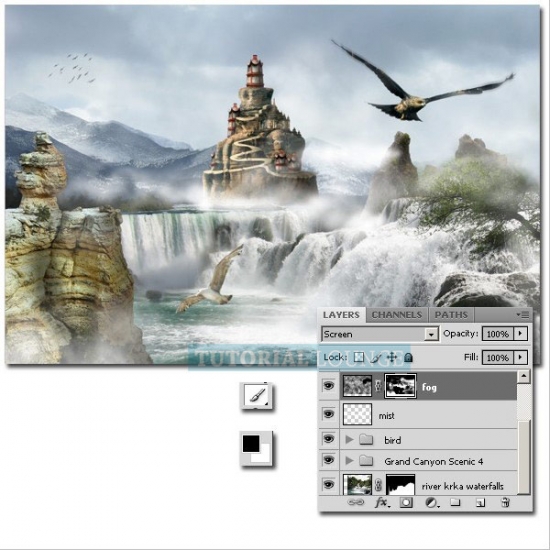
Step 36
Add adjustment layer above all layers and don't create clipping mask.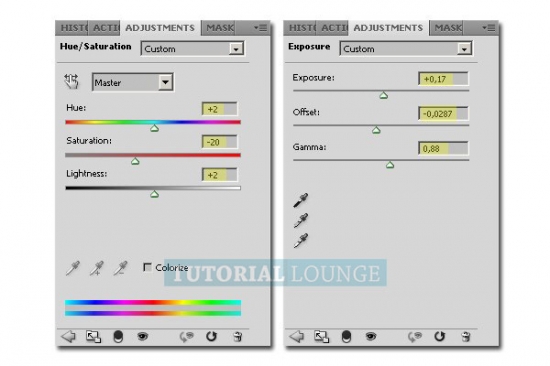
Step 37
Add black line at top and bottom. Create selection with Marquee Tool then fill with black.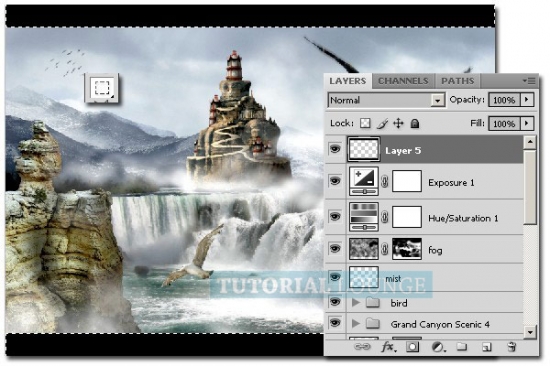
Final Image of Air Temple
And this is the final image of the tutorial.
Very Nice Creation...Very impressive.I found your website perfect for my needs.Keep up the great work.
ReplyDeleteClipping Path Service