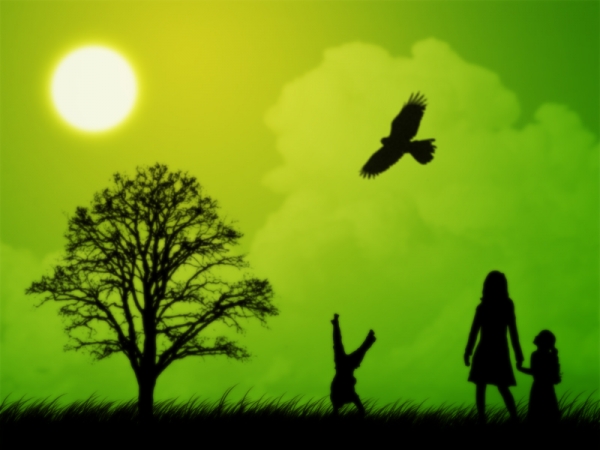
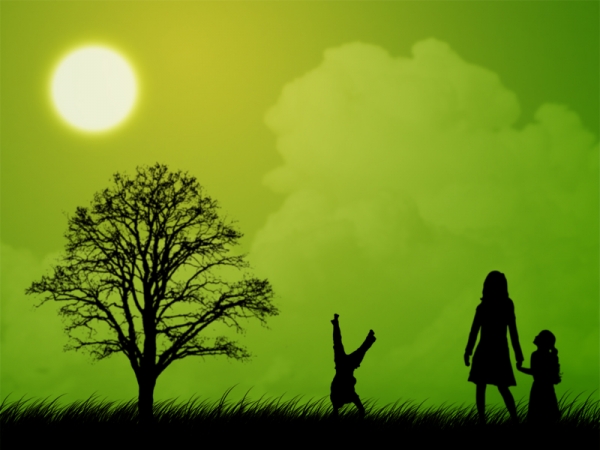
Today we will learn how to create a Dusk landscape in Photoshop. We use simple technique in Photoshop and color brush. So let's have a look.....
Step 1
Create a new document
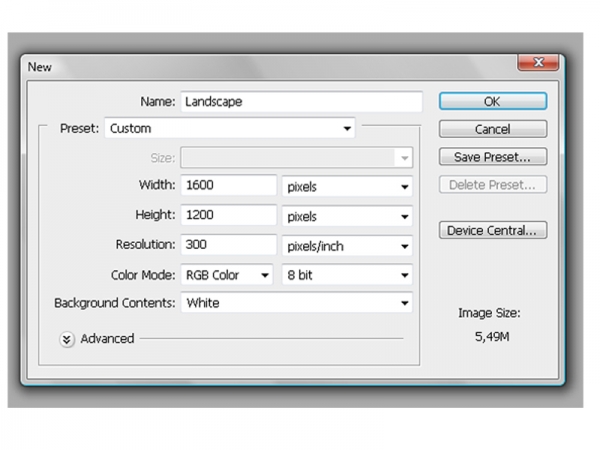
Step 2
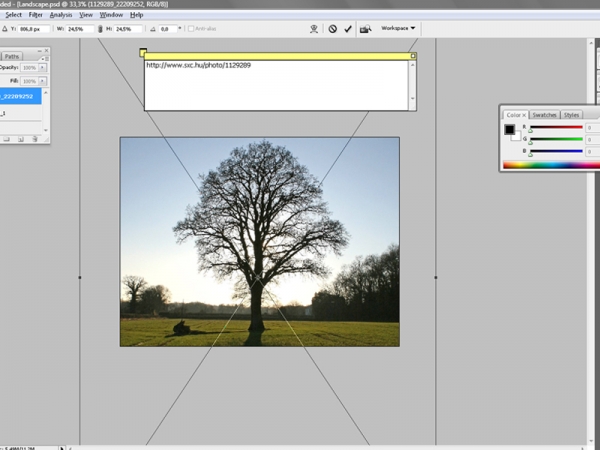
File -> Place
Place the tree in your document
Step 3
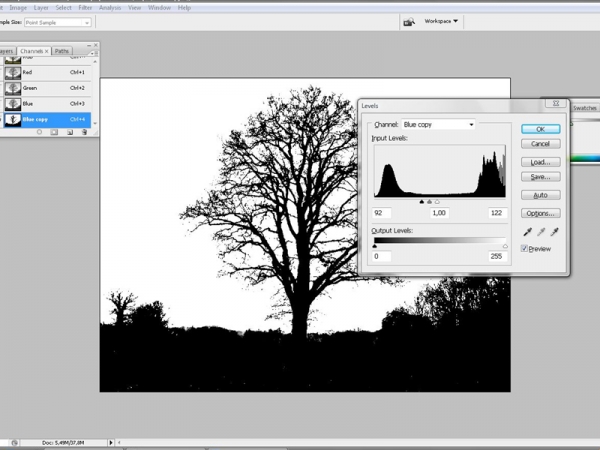
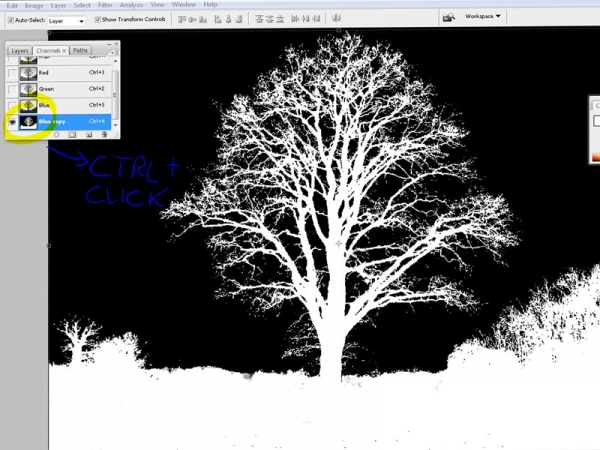
With the tree layer selected go to the channels, duplicate the blue channel then click Ctrl+L to modify the levels.
Apply settings similar to mine: the task is to increase the contrast to reach a B/W image.
Step 4
Now, when the contrast is like mine, press Ctrl+I to invert the blacks with whites, then Ctrl+click on the channel's thumbnail to select it (we are selecting the whites)
Step 5
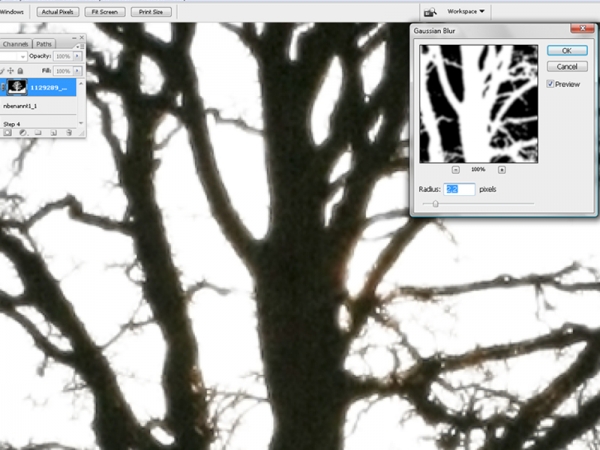
Now click on the RGB channel in the channels palette menu, and with your selection still active click on the layer mask icon. Magically our tree is masked!!
Let's make a smooth selection applying a gaussian blur to the mask.
Filter->blur->Gaussian blur
Step 6
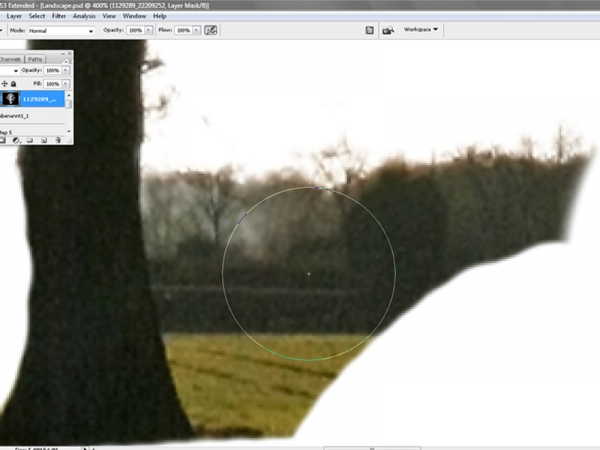
Remain on the layer mask of the tree layer, pick up a big black brush, set the hardness to 90% and erase the parts you don't want (the ground, other foliage etc...)
Step 7
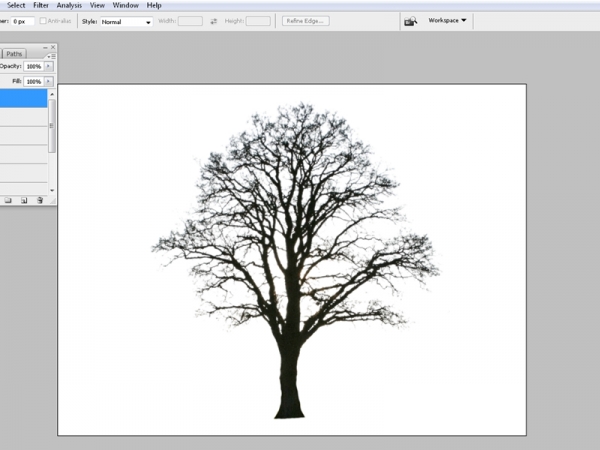
Ok our tree is ready!! =D
Right click on the layer mask -> apply layer mask.
I strongly suggest you to save this as a brush and as a shape! A tree in this quality can always be useful in the future.
Step 8
Now I choosed this source to make the job easier for this tutorial: I could have chosen a normal photo as source, but do that quickly let's use this silhouette image.
The selection here is made with the magic wand tool (W)
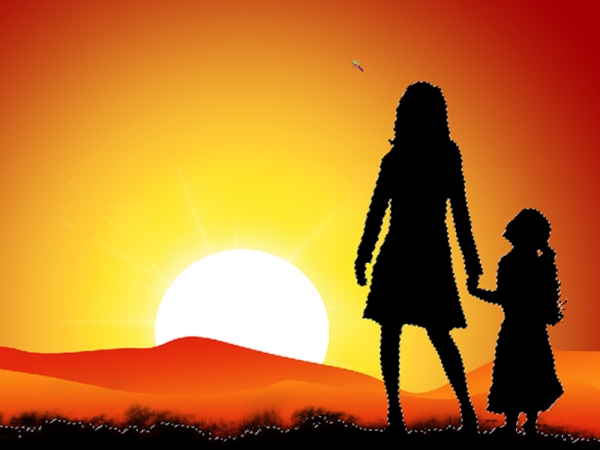
Step 9
After making the selection of the mum and the children, click on the layer mask, then with a big black brush let's erase what is not needed.
Always use a layer mask, never the eraser.
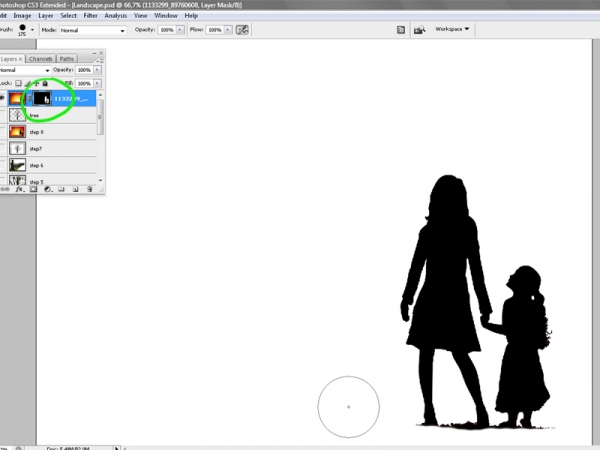
Step 10
Finally right click on the layer mask -> apply layer mask.
Then place the source of the boy making a cartwheel. We're going to use again the blue channel to make a neat, fast and easy masking of our subject.
Duplicate the blue channel
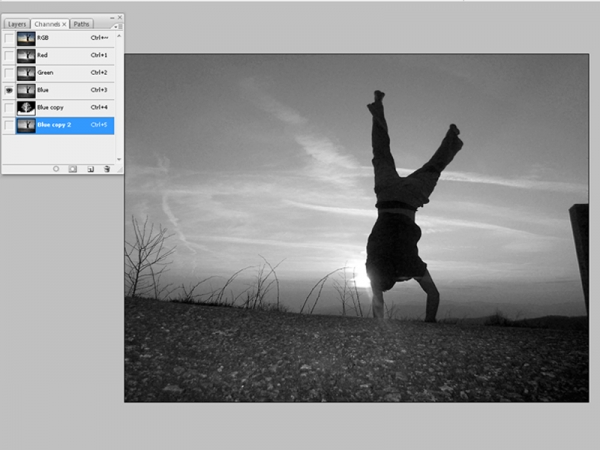
Step 11
Ctrl +L to open the levels. Set the arrows similar to mine. Sometimes is necessary to apply the levels more than one time: the important is to reach a B/W image (is not a image remember is a channel )
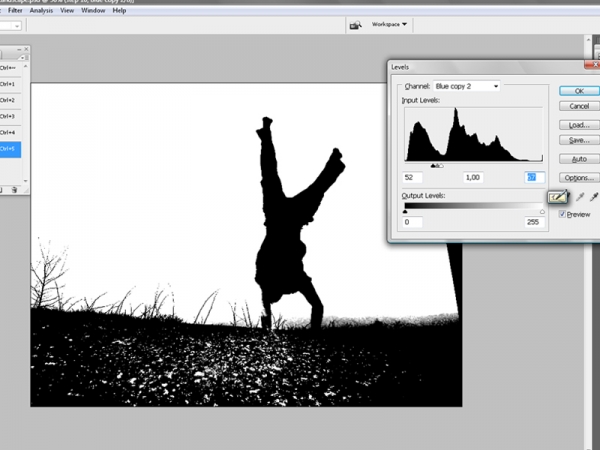
Step 12
Now the process is exactly the same we used for the tree: clean the unwanted parts (specially near the sunset and the arm) always using a black brush on the layer mask.
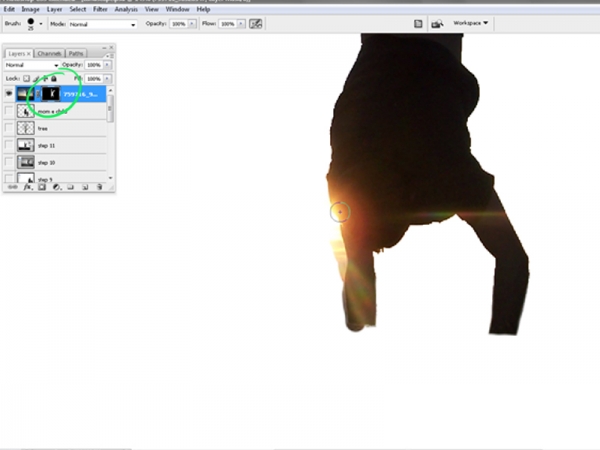
Step 13
Apply some blur on the layer mask to make a smooth selection (just 1 or 2 as value is ok).
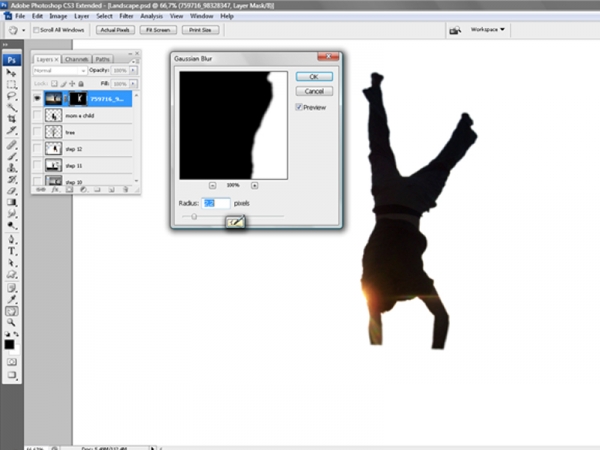
Step 14
Let's make some grass now.
Create a new layer, and pick up a grass brush (is in the presets of Photoshop)
To choose it press B on your keyboard and then right click. If it's not yet in there, well load it.
Apply these settings of scattering and shape dynamics. To find these settings go to Window->Brushes (F5)
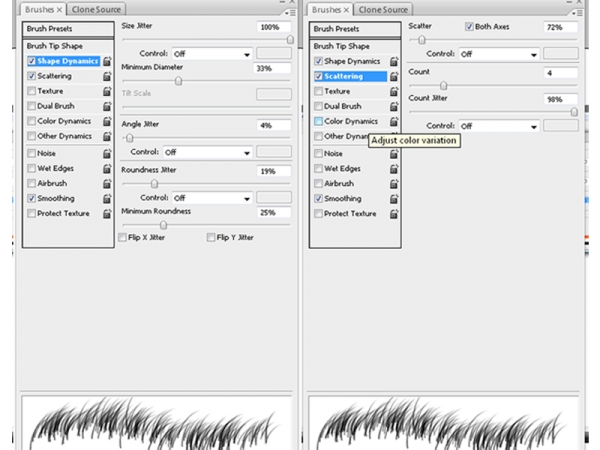
Step 15
Paint a "line" with this brush to make a very nice grass.
Then with a round black brush (you can work on the same layer, no need to create a new one) cover the blanck part at the bottom.
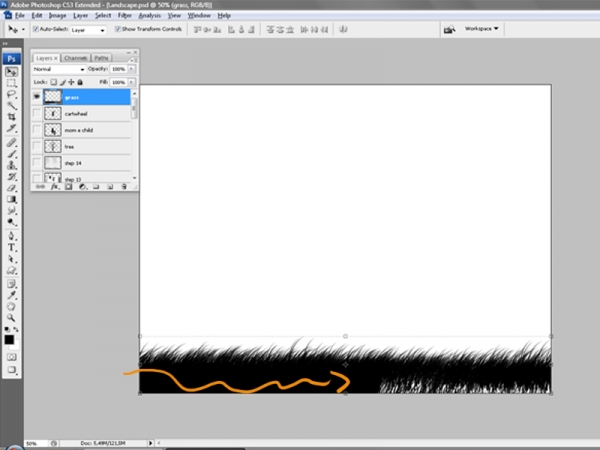
Step 16
Now let's make the tree and the cartwheel boy completely black (the mum and children are already black).
To do so press Ctrl+U to open Hue/Saturation and bring the lightness to zero.
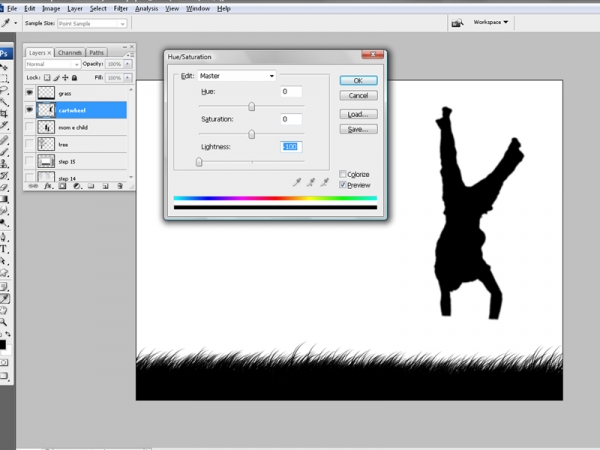
Step 17
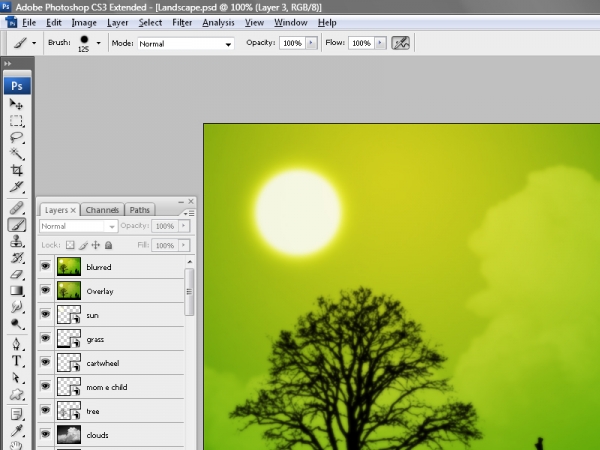
Ok you should have these layers at this point
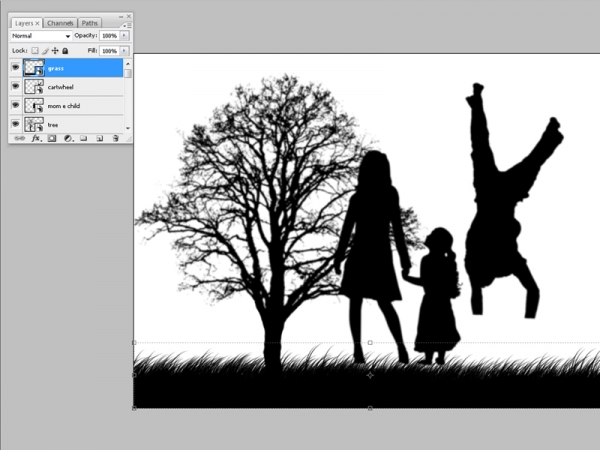
Step 18
Let's make the color.
Choose this two layer as foregroung and background color, then on a new layer use the gradient tool to make something like that.
Check the "radial gradient" option.
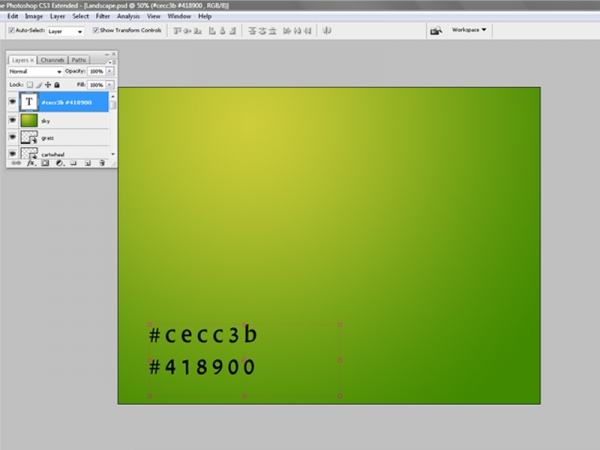
Step 19
Transform each layer in a smart object so when you scale them they won't loose quality.
To do so -> right click on the layer's thumbnail->transform to smart object.
Your layers scheme should be like that now.
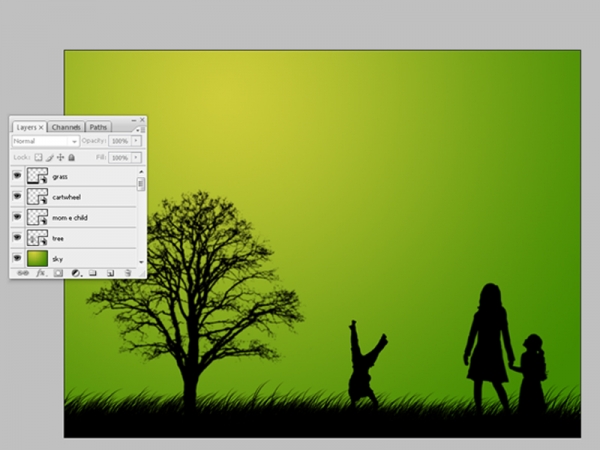
Step 20
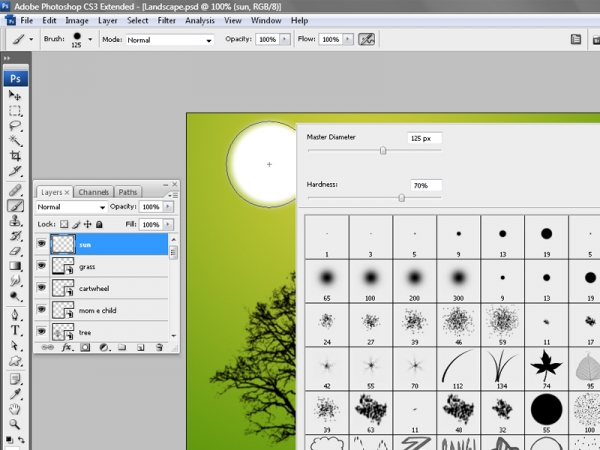
To make the sun: create a new layer and make a circle with a white brush...
Step 21
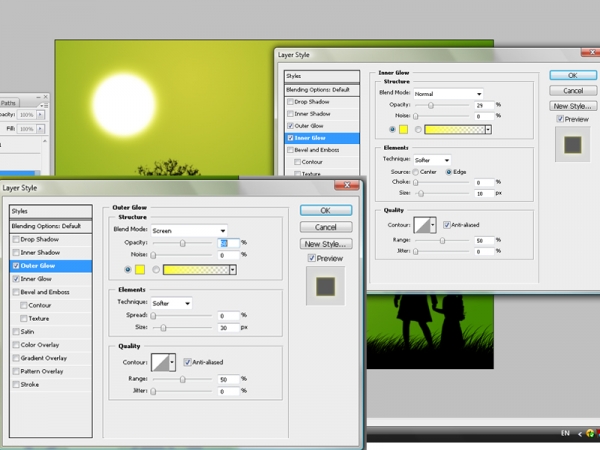
...then go the blending options and apply these settings for an outer and inner glow
Step 22
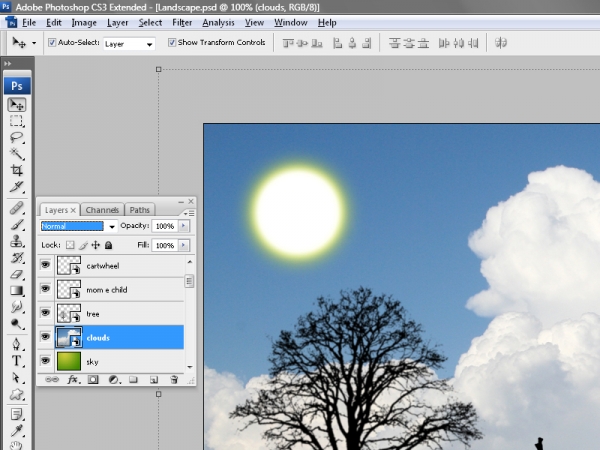
Ok then convert the sun layer into a smart object and reduce the opacity of the layer to 20%.
Then place the clouds layer between the green sky layer and the other black layers.
Step 23
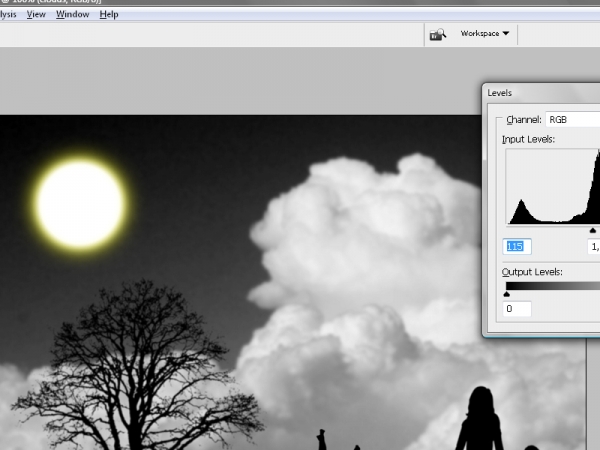
Then press Ctrl+Shift+U to desaturate the clouds layer.
Now that is in greyscale press Ctrl+L and increase both the whites and blacks, but not too much, just create a strong contrast.
You can also use Image->adjustments->brightness/contrast
Step 24
Ok now set the opacity to 40% and the blending mode to Soft Light.
Step 25
Now:
- Ctrl+A to select all
- Ctrl+Shift+C to copy merged (copy what we are seeing)
- Ctr+V
- Ctr+J to duplicate this "merged" layer.
Then set one to Overlay and opacity to 50%.
Finally leave the second in Normal and set opacity to 60% then apply a Gaussian Blur of 5.
Done!!!
Step 26
I added also a bird so it looks like the mum is more interested in what his son is doing, while the girl is more attracted by this eagle =D
Hope you enjoyed, and get fun in making something original!!
Hope you can learn something new from this tutorial.
I feel really glad if you give me feedback through comment below. Soon i am going to show more interesting & innovative tutorials so please keep visit our blog. That’s for now.
Have fun!
Feel free to contact with Clipping Design for clipping path service, image editing service, image masking service or any kind of design support.
Thank you…
Credit: pxleyes.com
Thanks a lot for your good job.Please keep continue sharing with us.
ReplyDeleteClipping Path Service