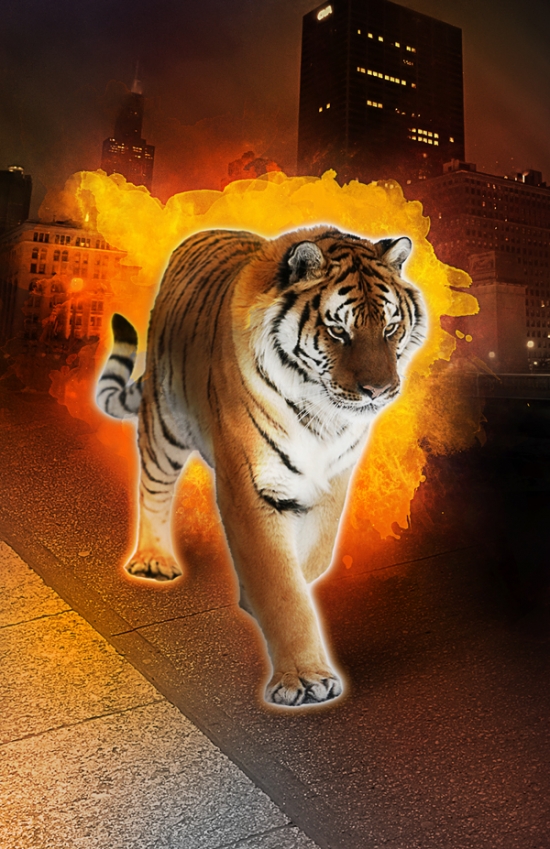
Today's tutorial we will show a nice fiery mixed media composition using Photoshop. We use color effects and another method in Photoshop. So let's have a start.......
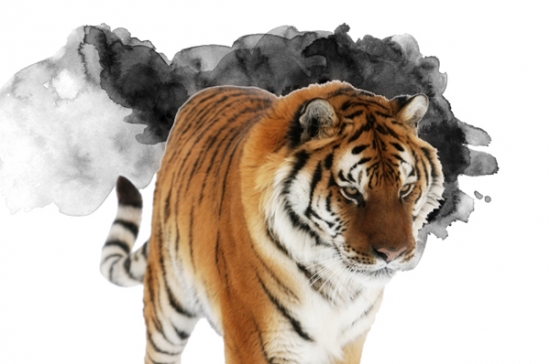
To start things off we are going to open the image of the tiger from the resources folder. Once the image is open in Photoshop, select your "Background" layer and press Command/Ctrl + J to duplicate it and turn the visibility of the original layer off as shown in the image below:
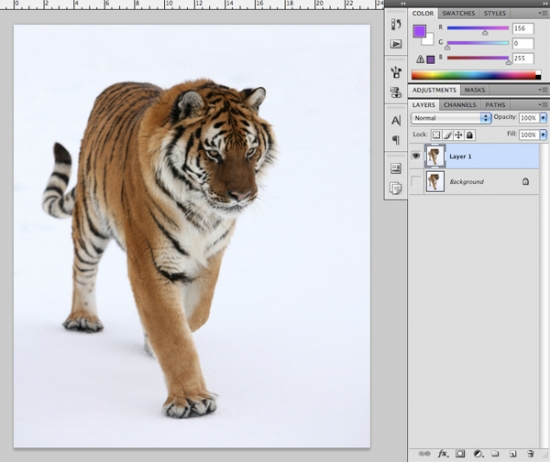
What we want to do next is click and hold your mouse over the Eraser Tool to reveal two additional tools. From this box we want to choose "Magic Eraser Tool" and make sure that your tolerance setting is at about 32. You will see the settings for the Magic Eraser Tool across the top of your window.

From here, all you have to do is click somewhere on the white background of the image and voila! Your background will disappear. We could have used the Pen Tool or a Layer Mask to remove the background, but once we start building our composition we will be using a light background so we shouldn't have to spend too much time on that.
Step 2
Next, create a new Photoshop document that is Tabloid size or 11" x 17" and 300 dpi. For now we will leave the image in RGB, but if we are going to print this then we will need to change the mode to CMYK.
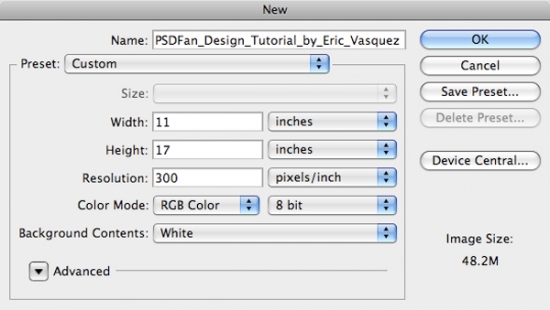
After creating your new file, drag the isolated tiger from the previous step into your document. You may have to scale the tiger up a bit to get it roughly the same size as the image. To do this, simply press Command/Ctrl + T to initiate a Free Transform and then drag any of the four corners outwards while holding down the Shift Key to constrain the proportions of the image.

Step 3
Now we want to add a Layer Mask to our tiger layer so we will select the Layer Mask icon from the bottom of the Layers Palette as shown below:

Switch to your Brush Tool (B) and select a hard round black brush at about 25 pixels in diameter.

Zoom in closely and begin to paint out some of the choppy shadow that wasn't removed earlier when we used our Magic Eraser Tool to extract the background from the tiger image. We just want to clean this up a bit more since we can always recreate the shadow later on if we need to.

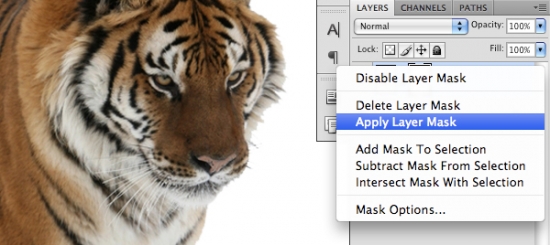
Once you are satisfied with the results of your mask, hold down the Control Key and click on the Layer Mask Thumbnail to reveal a dropdown menu. From this menu, select "Apply Layer Mask" as shown in the image below:
Step 4
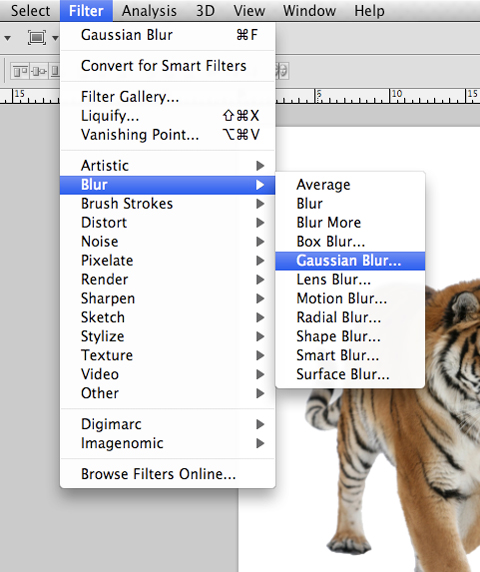
Select your tiger layer and press Command/Ctrl + J to duplicate the layer and then select this layer. Go to the Filter Menu and choose Blur - Gaussian Blur as shown in the image below:
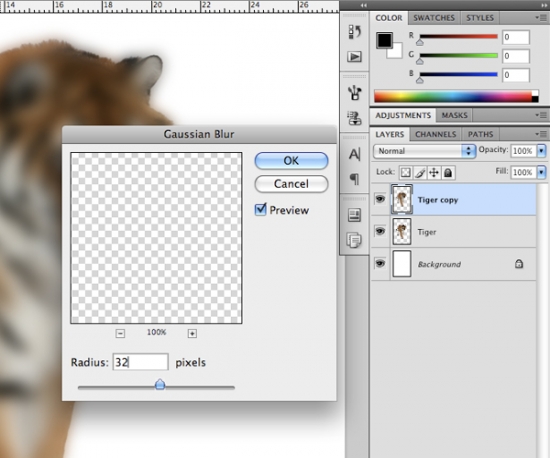
Once the dialog box appears, apply a 32 pixel blur to the image and press "OK" to apply the Gaussian Blur.
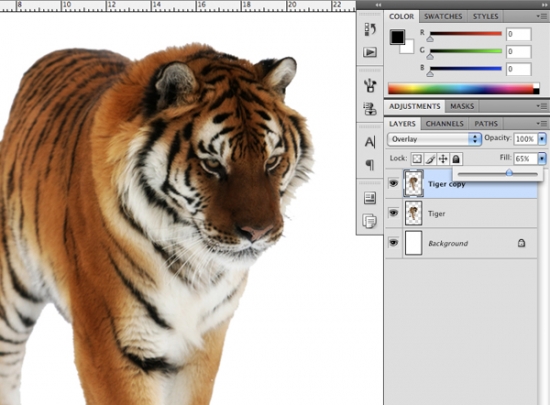
Change the Blending Mode of the blurred layer to Overlay and then reduce the fill to about 65% to bring out some of the contrast of the tiger. Using the Overlay Blending Mode will also make the colors appear richer and more vibrant.
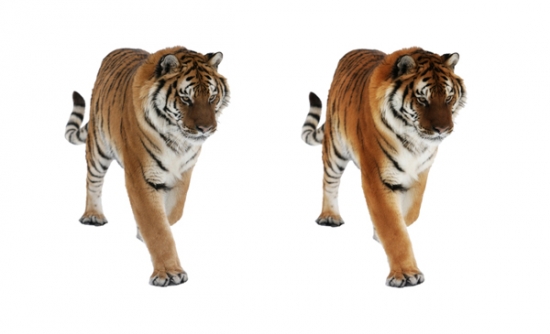
To see the effect that this has on your image you can toggle the visibility of the top layer on and off. The image below will also show you the difference between the tiger before and after we blurred the layer and applied an Overlay.
Step 5
Select your top layer and while holding the Shift Key select the layer underneath it. You should now have both of your tiger layers highlighted and selected. From here, press Command/Ctrl + G to put both of these layers into a Group Folder and call it something clever like "Tiger."
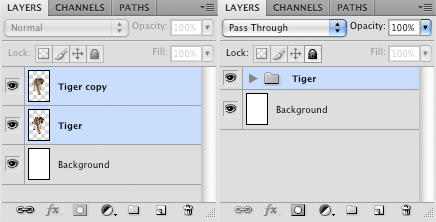
Placing these layers into a folder will help us keep track of similar layers that belong together as we continue to build our Photoshop composition. You may think that it's a pointless step right now, but you will thank me when you have 50+ layers in a file and can't find the one you are looking for.
Step 6
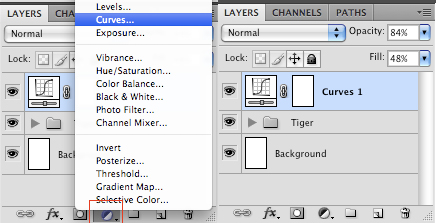
Make sure that your top layer (the group folder) is selected and click on the Adjustment Layer icon shown at the bottom of your Layers Palette. From the pop up menu, select "Curves" as shown in the image below:
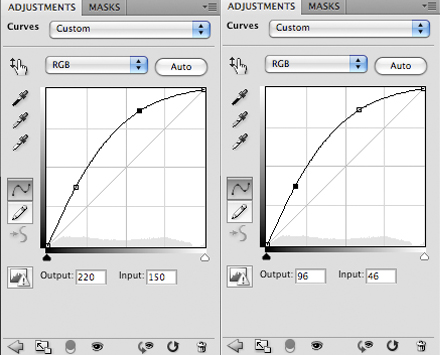
You will now notice that you have a new layer showing your Curves at the top of your Layers Palette. Click on the Curves thumbnail and create two points along the diagonal line. Refer to the image below to see the placement and settings for both of these two points.
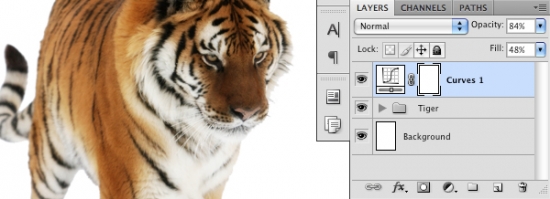
Once the settings have been applied you will see that there is a noticeable difference in the highlights and shadows of the tiger. What we want to do is just lower the opacity to about 84% and the fill to about 48% to lessen the effect a bit.
Step 7
Create a new layer below the tiger folder and load up the watercolor brushes from the resources folder through Photoshop. Select some of the larger brushes and with a solid black color begin to paint on the background.
The idea is to play around with the brushes by flipping and transforming them into different configurations. The brushes create interesting shapes and they will also add depth to your illustrations.
Create another new layer, and this time place it above the tiger folder. With a bright orange color - Here I am using #FFAE00.
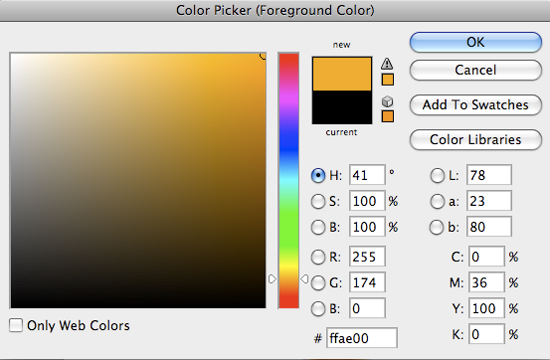
Begin to paint on this layer keeping in mind that you want to experiment with the shapes of the different brushes until you are happy.
After you have done that, change the Blending Mode of the orange layer to Overlay and you should have something like the image below:
We are now going to place a Layer Mask onto this layer by clicking on the Adjustment Layers icon indicated at the bottom of the Layers Palette. You will then want to paint onto this layer using a large soft round brush set to black. Paint into this layer will enable you to blend the color into the background and by brushing around the hard edges of the brush you will get a softer, more natural effect.

Step 8
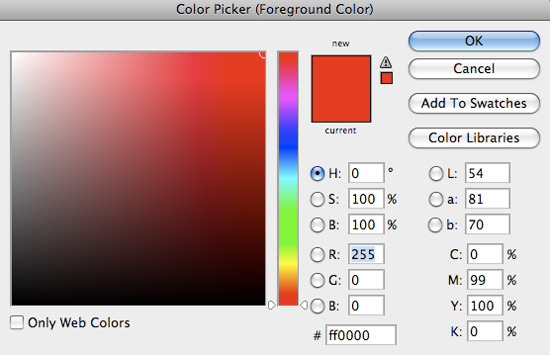
Create a new layer above the orange paint layer from the previous step and change the Blending Mode to Linear Dodge (Add). Select another one of the watercolor brushes and use a vibrant and punchy color like the one below:
Paint onto your layer and experiment with the placement of your brush. Here I have placed one of the brushes so that it overlaps part of the head of the tiger.
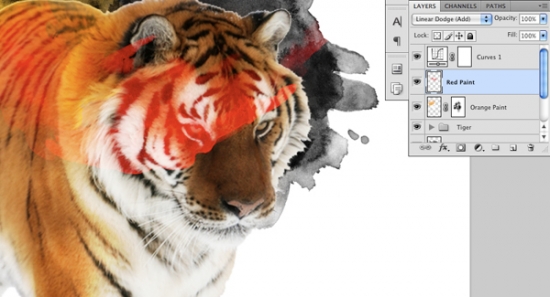
In the same way that we blended the orange color using a Layer Mask, we are going to also fade the edges of the red brush so that we can blend it into the fur. Remember to also switch back to a soft round brush when masking - an easy way to pull up your Brushes Palette while working is just by pressing the F5 key.
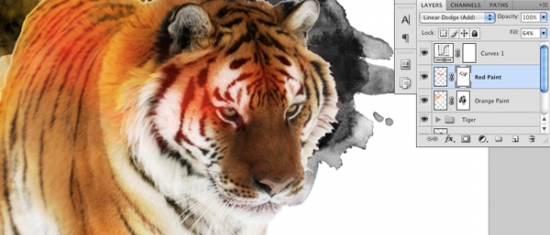
In addition to softening the edges of the red color I have also lowered the fill to about 65%. We are going to be building up a gradual brightness by using other methods so the key here is just to add depth.
To enhance the effect further, make sure you have a soft round brush selected and use the same red color to brush some color into other areas of the fur. Notice the Layers Palette where you can switch back and forth between the layer and the mask. By doing this you can easily add color back to different areas or take them out, but the important thing is switching back and forth between the two.

I wanted to spread the color out a bit by brushing onto the legs and body of the tiger. By keeping this layer with a mask we can return to it at any point to modify it in a non-destructive way.
Step 9
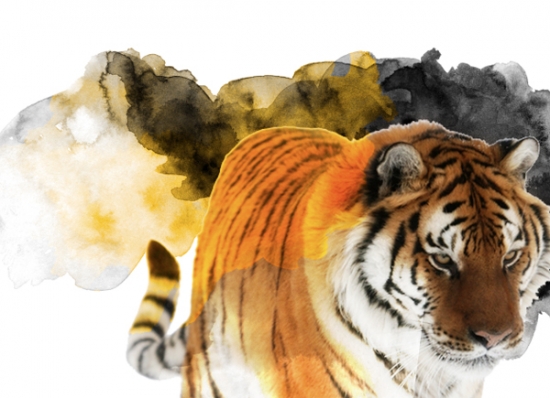
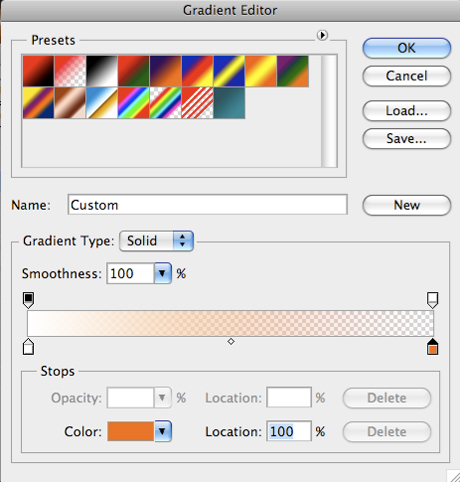
Open up the tiger folder and double click on your original silhouetted tiger layer. This will bring up the Layer Styles Dialog Box where you want to then select "Outer Glow" from the panel. Apply the same settings as shown below and notice that instead of using a solid color here I have chosen to use a gradient.
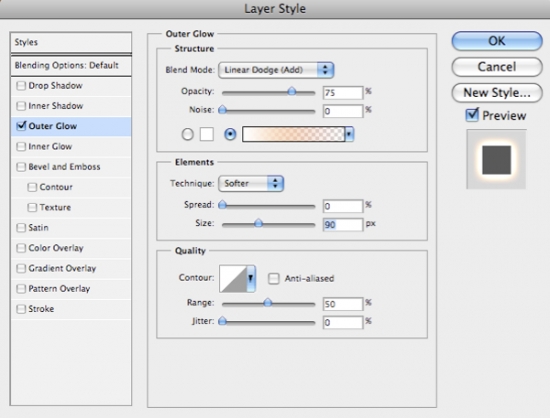
For the gradient, we want it to go from a solid white color to a transparent orange color so we just get a hint of that as it fades out.
Doing this will add some contrast between the tiger and the background elements in addition to having a cool effect on the surrounding colors in the design.
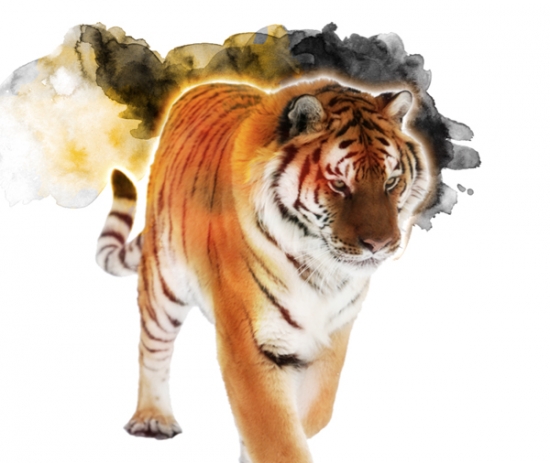
Step 10
Now that we have started to build up an interesting and tactile background with various brushes it seems that the bottom part of the tiger feels a bit empty. In order to balance out the image further I have placed a new layer below the tiger folder, but above the original black paint layer. Continue to experiment with the different watercolor brushes using a solid black color in order to build up the effect even more.
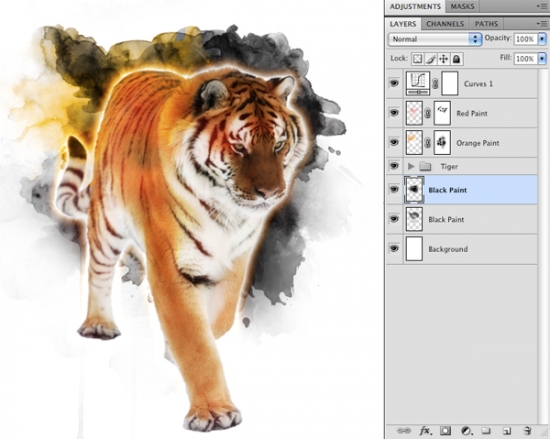
For this step I would also recommend using a Layer Mask as we did in the previous steps to remove any unwanted sections from the paint layers until you are happy with the way your composition is looking.
Step 11
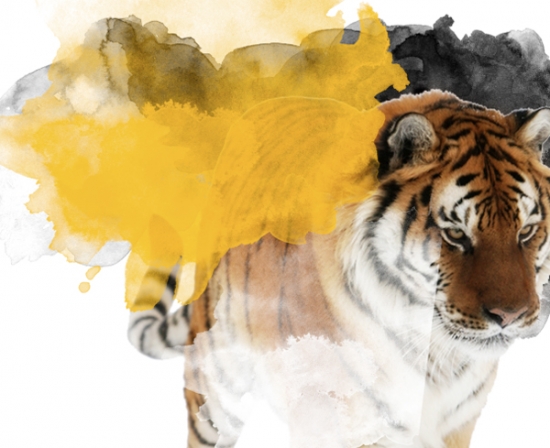
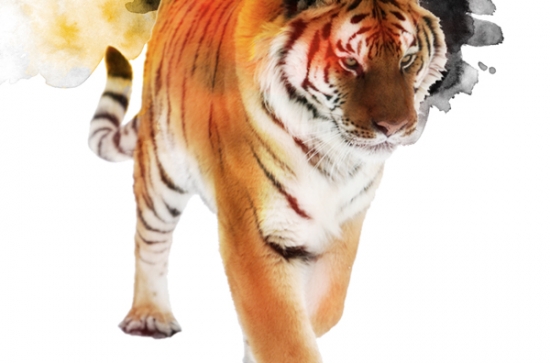
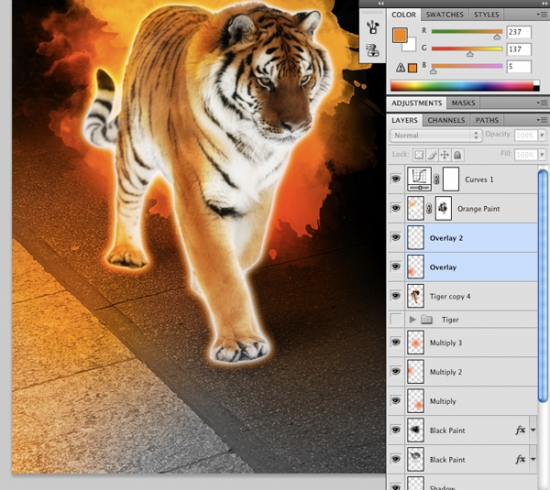
Create another new layer at the top of your Layers Palette and select a yellowish-orange color such as #FFA800 as shown in the image below:
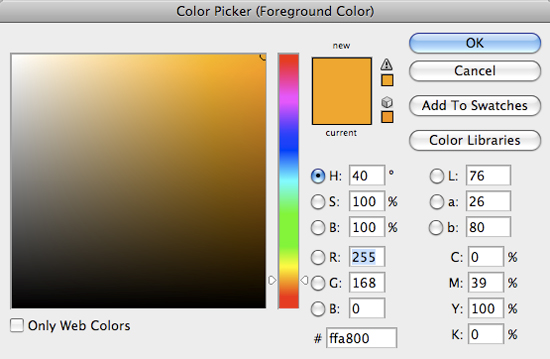
Switch over to your Gradient Tool (G) and select a Radial Gradient that fades from solid to transparent after choosing your color.

Click your mouse and drag outwards to create a small-to-medium sized gradient. Place the gradient over the head of the tiger and change the Blending Mode of the layer to Overlay. In addition, lower the opacity and the fill to about 70% each.
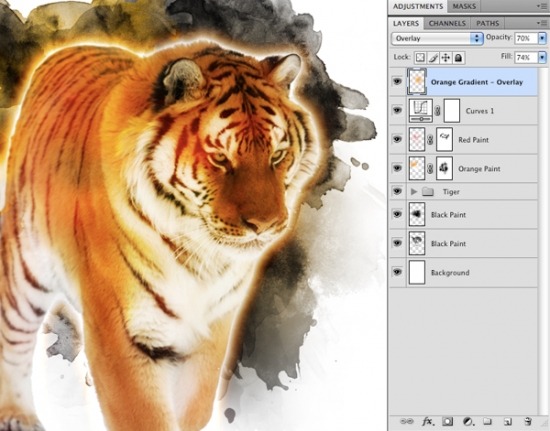
By doing this we can begin to bring out some more color in other areas of the image. We began by layering some orange and red colors on top of the black background in a small section of our image, and now we have begun to spread this color throughout other areas to create some asymmetry and tonal balance.
Step 12
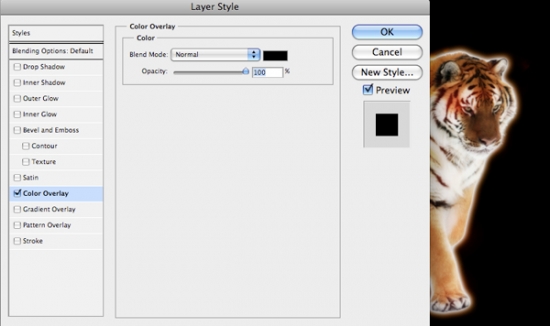
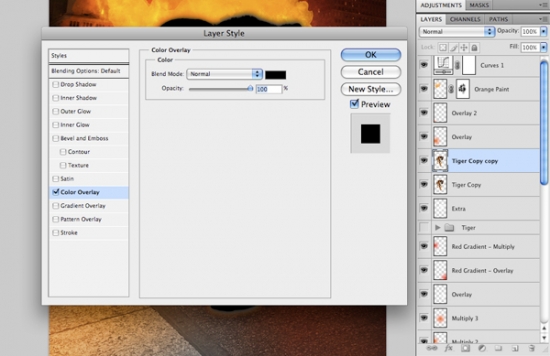
Next, double click on the Background layer to bring up the Layer Styles Dialog Box. Check off "Color Overlay" from the vertical menu on the left and select a solid black fill color.
Press OK to accept the changes and then double click on the black paint layers and do the same thing, except for these, we want to use a vibrant orange color such as #FF9000 as shown in the image below:
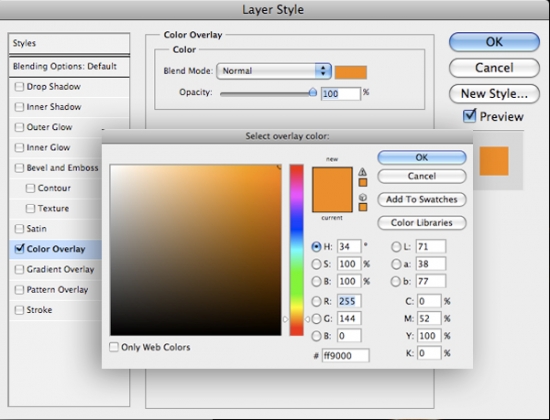
After doing this you will notice that it totally changes the feel of the image and switches things up a bit. You should also now note the small "Fx" icon on your background and black paint layers.

Step 13
Open the image of the city sidewalk from the resources folder and bring it into your Photoshop file. Use the Free Transform (Command/Ctrl + T) to rotate and scale the image up so that you can fit the sidewalk nicely right in the foreground of the image. Placing the image this way gives the tiger some context and also makes the design more dynamic.

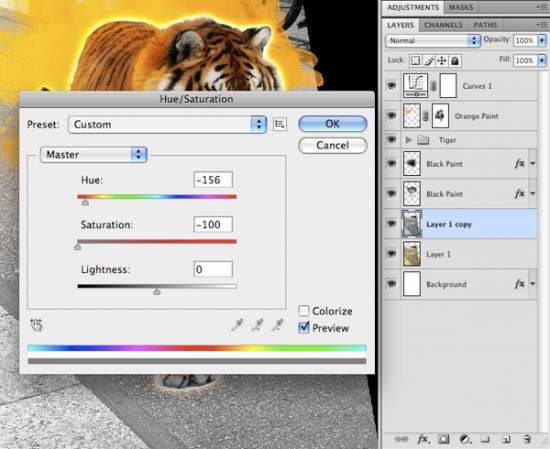
Make a copy of the layer once you are happy with it's placement by pressing Command/Ctrl + J. With your duplicated layer selected, press Command/Ctrl + Alt/Option + U to bring up the Hue/Saturation Adjustment. From here, move the middle slider all the way to the left to desaturate the sidewalk.
Create a new layer above the top sidewalk layer and switch to your Gradient Tool. We will want to use a Linear Gradient that fades from solid black to completely transparent as show below:

On your new layer, click your mouse off towards the upper right corner and drag down and to the left to create your gradient.
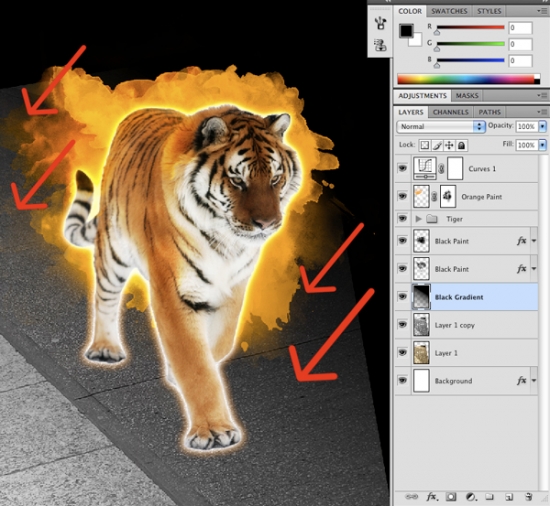
After getting a nice fade going we can create a gradual blend that will add a bit of depth to our design.
Switch to your Brush Tool (B) and with a large soft round brush, paint with a black color at a low opacity over your gradient layer to continue to smooth out the edges a bit further to enhance the effect.
Step 14
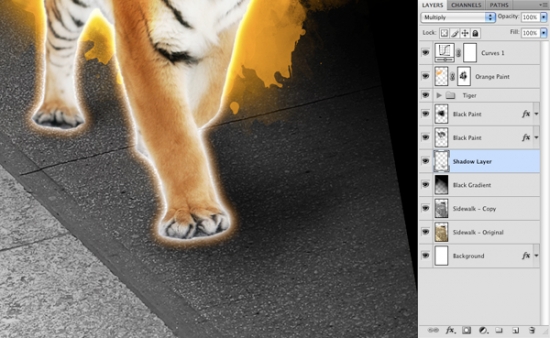
Create a new layer just above your black gradient layer and with a large soft round brush selected, begin to brush in some shadows on the ground with a low opacity of about 10% so that you can build your shadows up gradually.
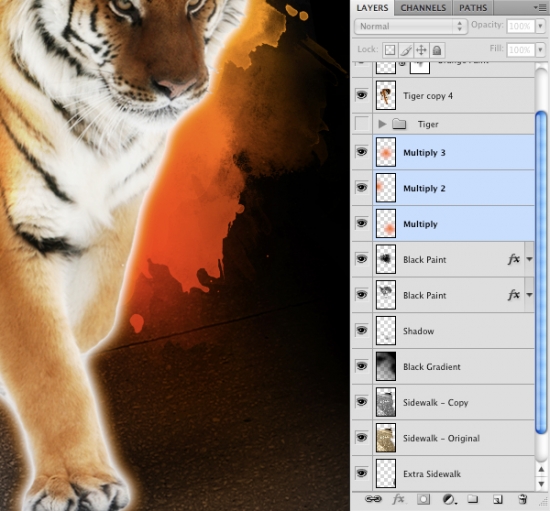
Create another new layer below the tiger layer and switch to your Gradient Tool (G). From here, select a Radial Gradient that fades from a vibrant orange color (#ED8906) to opaque.
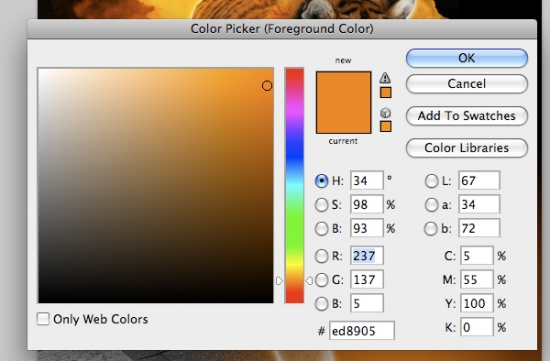
Change the Blending Mode to Multiply and move it below the tiger until you are happy with the placement.

Create two more copies of the Multiply layer and move them around behind the tiger to show the lights reflection on the ground.
Try a slightly more reddish color and create another Radial Gradient, this time placing it above the tiger. Subtle variations in color will add more value and tone to the overall image.
Step 15
Next, open the city backdrop image from the resources folder and scale it up so that it fills the whole top portion of the image and you can extend it a bit beyond the canvas area as you see fit.
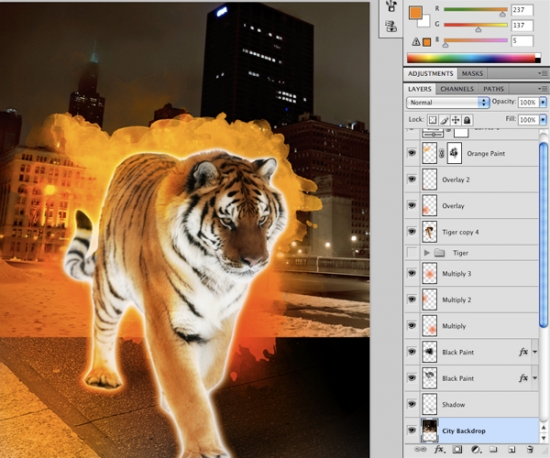
What we want to do next is desaturate the image by pressing Command/Ctrl + Alt/Option + U and moving the middle slider all the way to the left as shown in the image below:

Switch to your Brush Tool and select a large soft round brush with a solid black fill.

With the city background highlighted in your Layers Palette, click on the Layer Mask icon at the bottom of the palette as shown here:
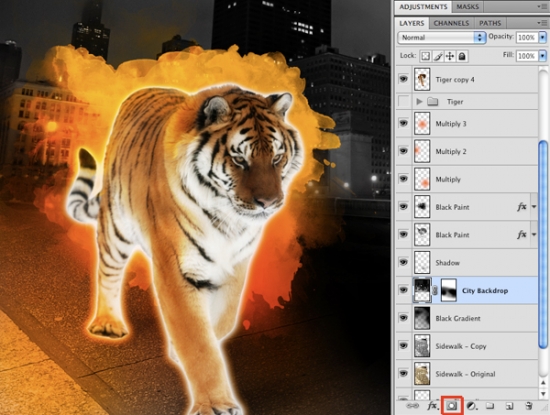
Paint with your brush into the bottom of the city layer to fade the bottom of the image into the background. Feel free to experiment with the blend here, and remember that you can always add parts of the image back in simply by switching the color of your brush from black to white.
Step 16
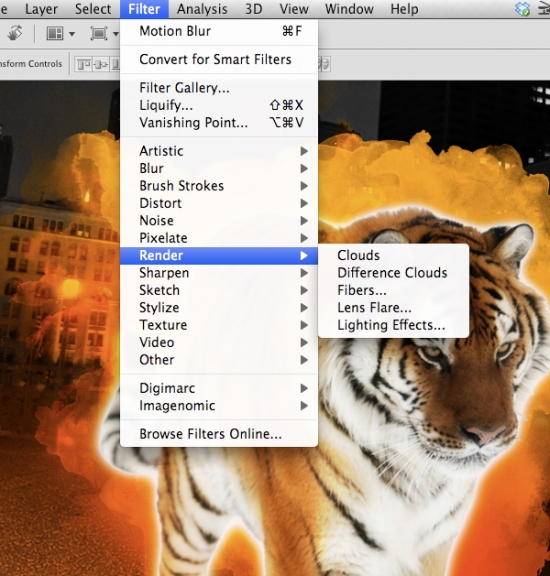
Press the "D" key on your keyboard to switch to your default colors and create a new layer just above the city backdrop. From here, go to the Filter Menu and choose Render - Clouds as shown in the image below:
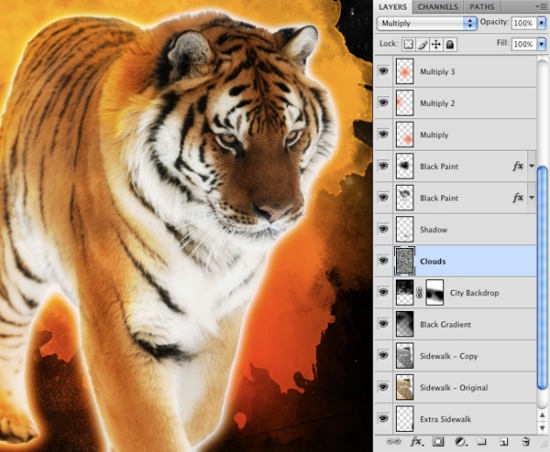
After applying the effect, change the Blending Mode of the cloud layer to Multiply.
Return to the Filter Menu and this time choose Blur - Motion Blur.
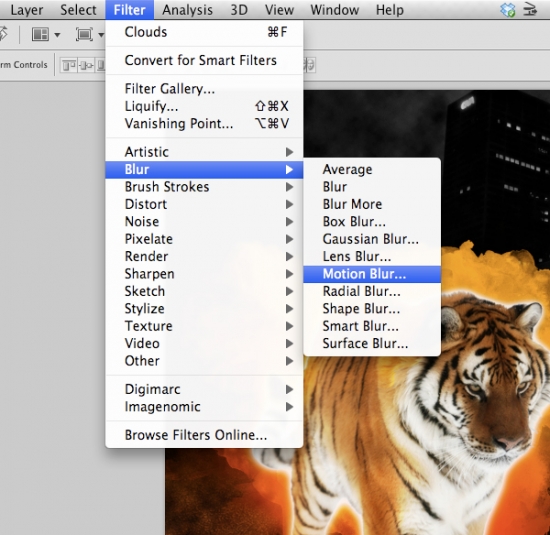
Max out the effect by moving the slider all the way to the right and change the angle to approximately 45 degrees as shown below:
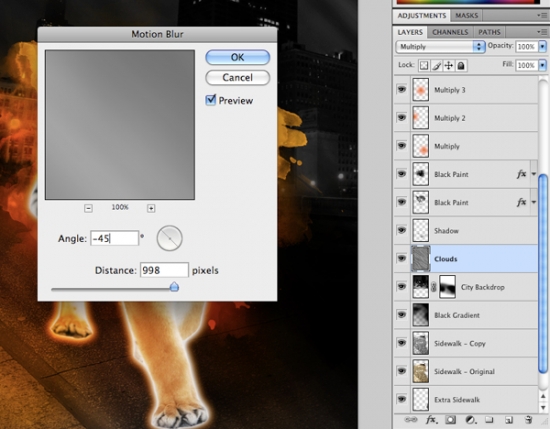
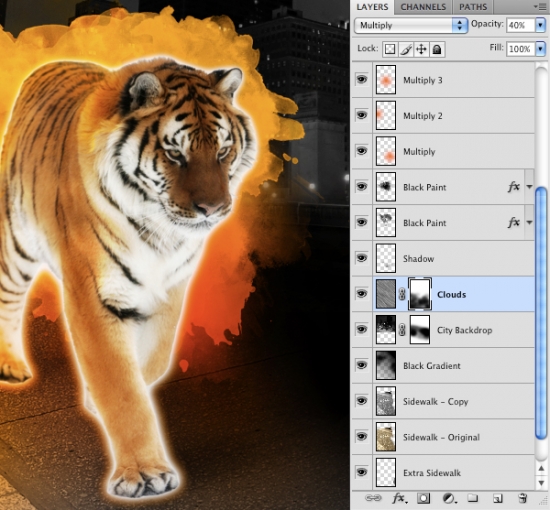
Add a Layer Mask to this layer and once again use a large soft round brush to mask out the clouds so that they are only appearing in the top portion of the image. Also try lowering the opacity of the cloud texture to around 40% for a more subtle effect.
Step 17
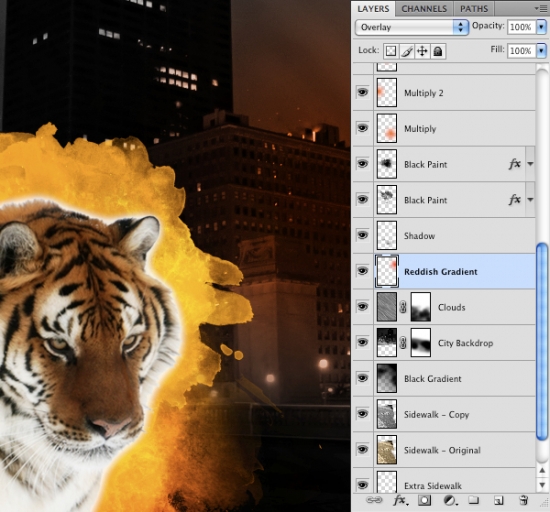
Switch to your Gradient Tool (G) and choose a vibrant orange-red color such as #FC4D00 as shown below:

Make sure that you have a Radial Gradient selected that fades from solid to transparent.

Create a new layer above the clouds texture and the city backdrop. Using your Gradient Tool (G) click and drag outwards to create your Radial Gradient. Change the Blending Mode of the layer to Overlay and you will have a nice color effect on the background.
Press Command/Ctrl + J to duplicate the Radial Gradient and experiment with the placement and color of each of the layers to gradually build up the effect.
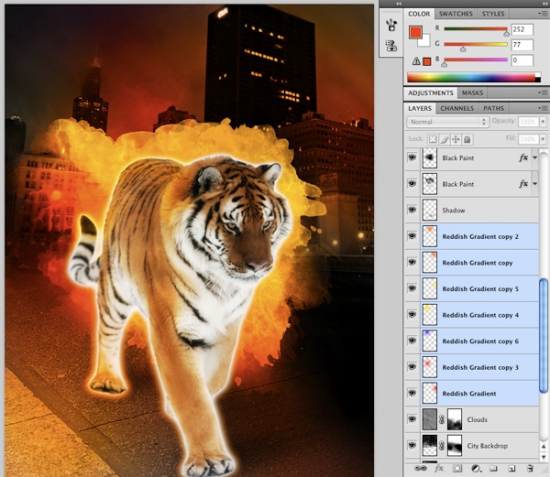
Select all of your gradient layers and then press Command/Ctrl + G to put them all into a Group Folder. Name the folder and reduce the opacity to somewhere around 60-65% to create a slightly toned down effect.

Step 18
Open the nebula image from the resources folder and bring it into your Photoshop document. Place the image just below the "Background Color" folder as shown in the image below:

Click on the Layer Mask icon at the bottom of the Layers Palette and use a large soft round brush to paint into the image using a solid black color. The idea here is just to mask out the edges so that you can see the street and city in the background while still leaving some of the texture behind the tiger.

Step 19
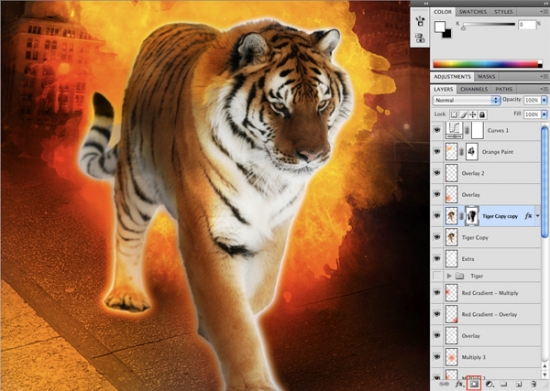
Select your tiger layer and press Command/Ctrl + J to duplicate the layer. Double click on the copy to bring up the Layer Styles Dialog Box and choose "Color Overlay" and use a solid black for the fill color as shown here:
Apply the changes and then apply a Layer Mask on the duplicated layer.

Using a large soft round brush with a solid black color selected, brush out the majority of the duplicated layer and leave only some of the shading on the left side. Doing this will emulate shadows and make the tiger fit into the space better.
Continue to play with this mask using the black brush to remove parts of the duplicate layer, and tap the "X" key to toggle back and forth between black and white. Using a white brush on your masked layer will bring the image back.
Step 20
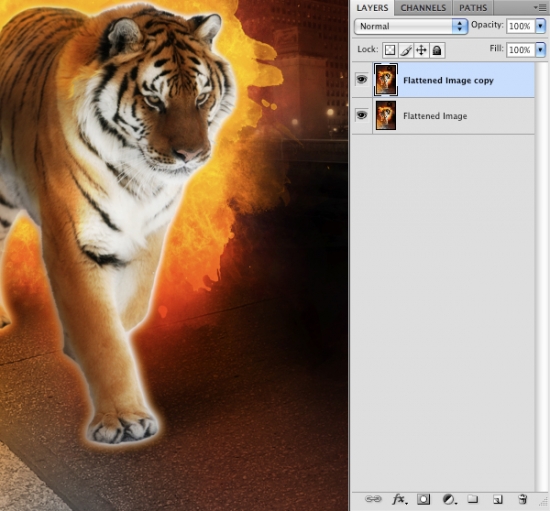
Once you are happy with the way your image looks, we are going to flatten the image.

After flattening the image, press Command/Ctrl + J to make a copy of this layer.
With the duplicated flat layer selected, go to the Filter Menu and choose Other - High Pass as shown in the image below:
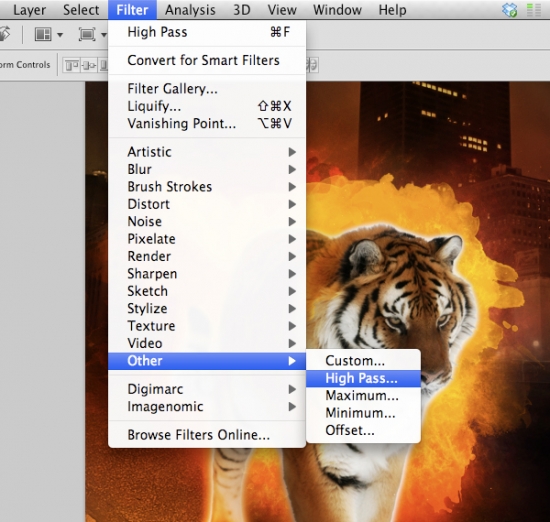
For the settings, apply a radius of about 10 pixels before pressing "OK" to apply the High Pass Filter.
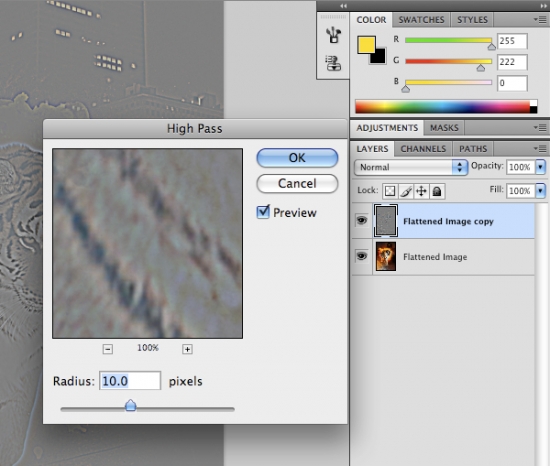
Doing this will sharpen the final image and add a bit of extra polish. Make sure to do a Save As rather than overwriting the layered version of your composition and take a look at the final design we have created.
If you have made it to this point then you have completed the tutorial and hopefully learned a few new tricks along the way. Thanks for following along! See you next time.
And We're Done!
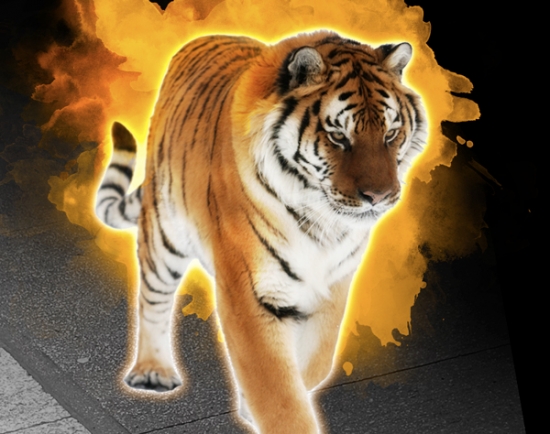
You can view the final outcome below. I hope that you enjoyed this tutorial and would love to hear your feedback on the techniques and outcome.
Credit: webdesign.org
No comments:
Post a Comment